Building a Woodworking Shop

Now that the foundation for a 24 foot by 32-foot building is in place, it is time to put a building on the foundation.  In the interest of time, we opted to have a Tuff Shed installed.  I can certainly build a building on my own but I am just one person.  I would have needed at least a month working every day to erect a building of this size.  After examining the options, we found a reasonably priced alternative with Tuff Shed.

This building is designed to sit on top of a 6-inch thick metal joist system that will support the building and have the strength to contain all of the heavy Woodworking machines that we will be using.

Delivery Day for the Woodworking Shop

Having completed the foundation for our business, I thought I would get a day to relax.  The installation of the shop was scheduled to begin on Tuesday and I was just puttering around moving a bit of gravel to level the driveway.  Next thing I knew a big truck with trusses was backing in to drop them off.  I’m glad they arrived but it sure would have been nice to have a bit of warning that they were expected.

Construction Day 1

Tuesday, I arrived at the job site early and waited for the installers to arrive.  Around noon I finally got a call that said they were arriving in a few hours.  They had the trailer loaded and were on the road from Nashville.  They arrived about 2:30 and immediately got to work.Workshop Flooring Installation and Levelling
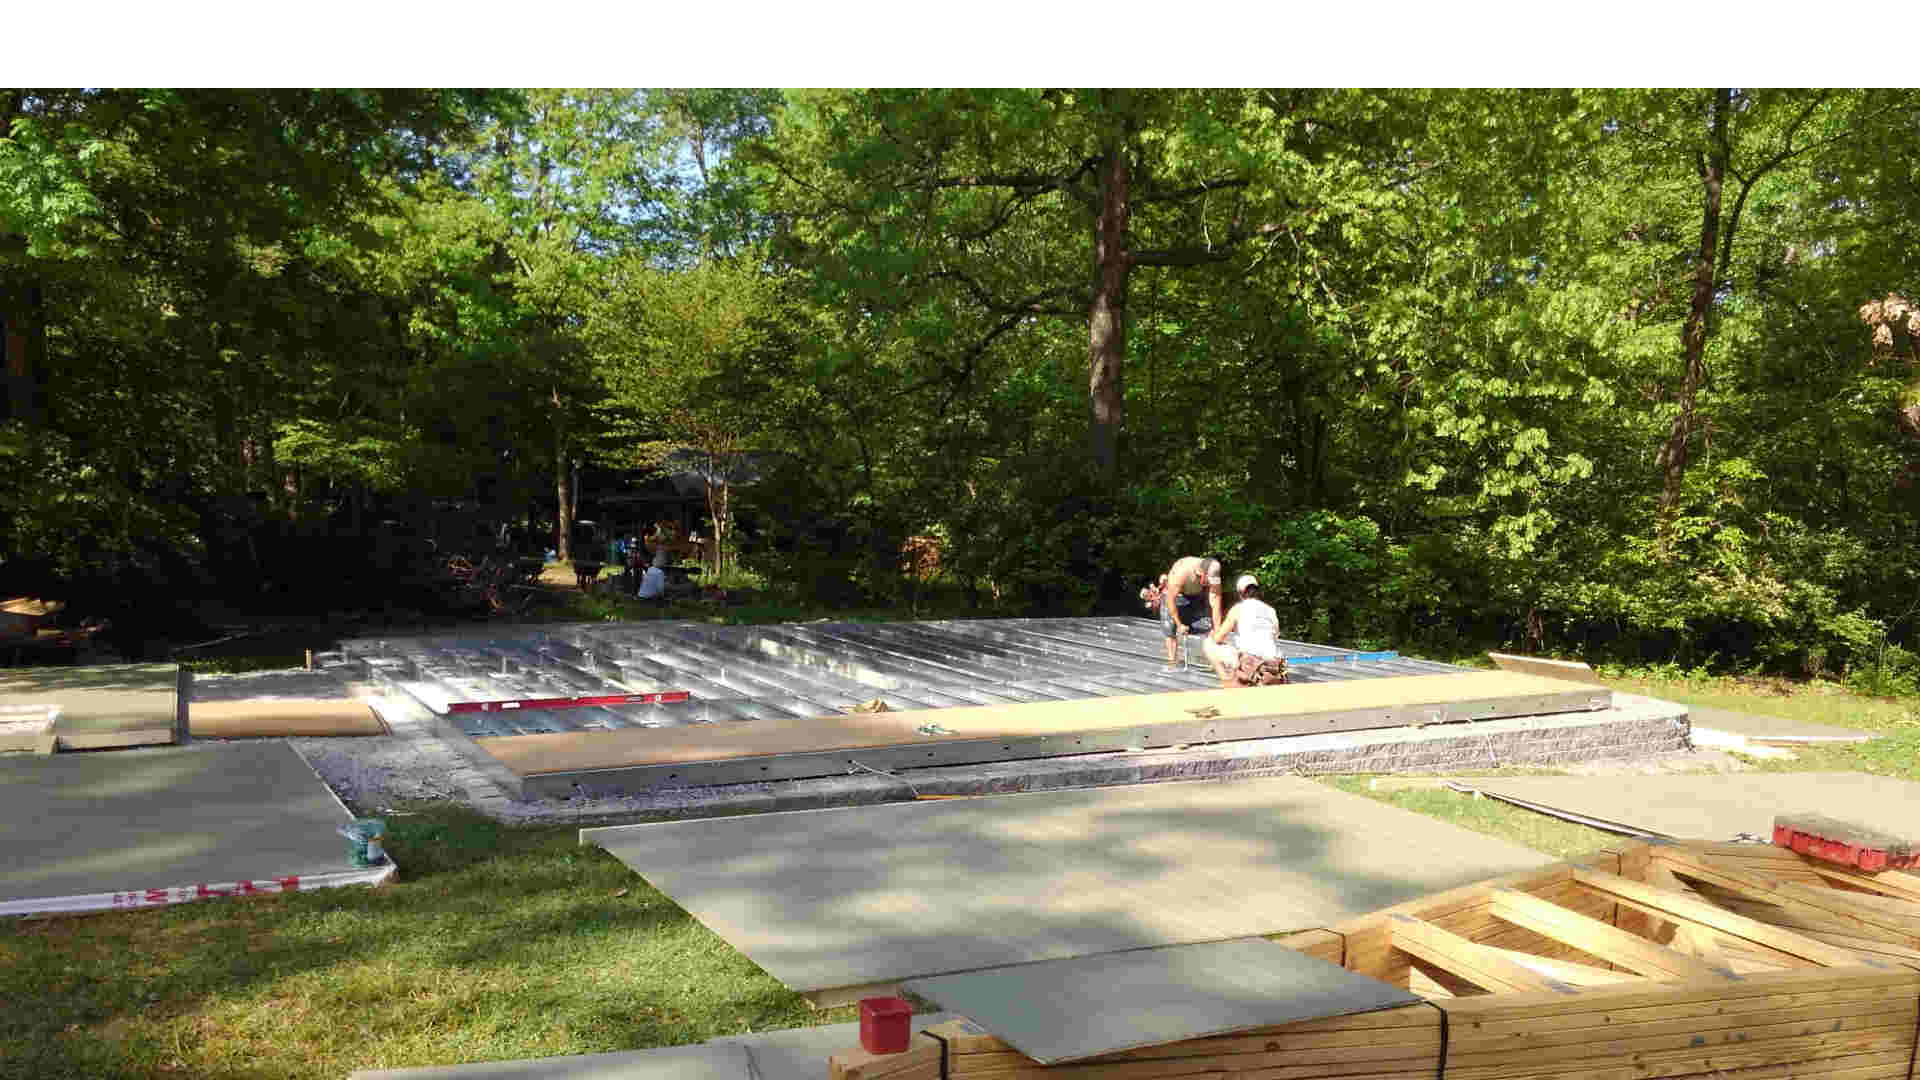
 While it took them a bit to arrive, I was very impressed with the two installers.  They were worker bees.  They knew the process, where everything was on their trailer and in what order things needed to be completed. These two guys really didn’t need to talk much.  They seemed to have the process down to a science.   While one was laying out flooring the other set up to paint the finish coat on the walls and trim.

When it was time, he jumped in and helped to level and assemble the floor.  The screw-guns got a workout and the floor joists came together quite quickly.

They got the floor laid out and partially assembled before the sun was set.  They worked right up until the sun hit the horizon.

Construction Day 2

The next morning they arrived bright and early and got to work finishing the floor.

By noon they had the floor joists in place, screwed together and levelled.  They really appreciated all of the work that I did to get a level foundation ready for them to work on.  From what they said, they don’t usually get a foundation that is that well done and it sped up their job immensly.
Workshop Walls Completed

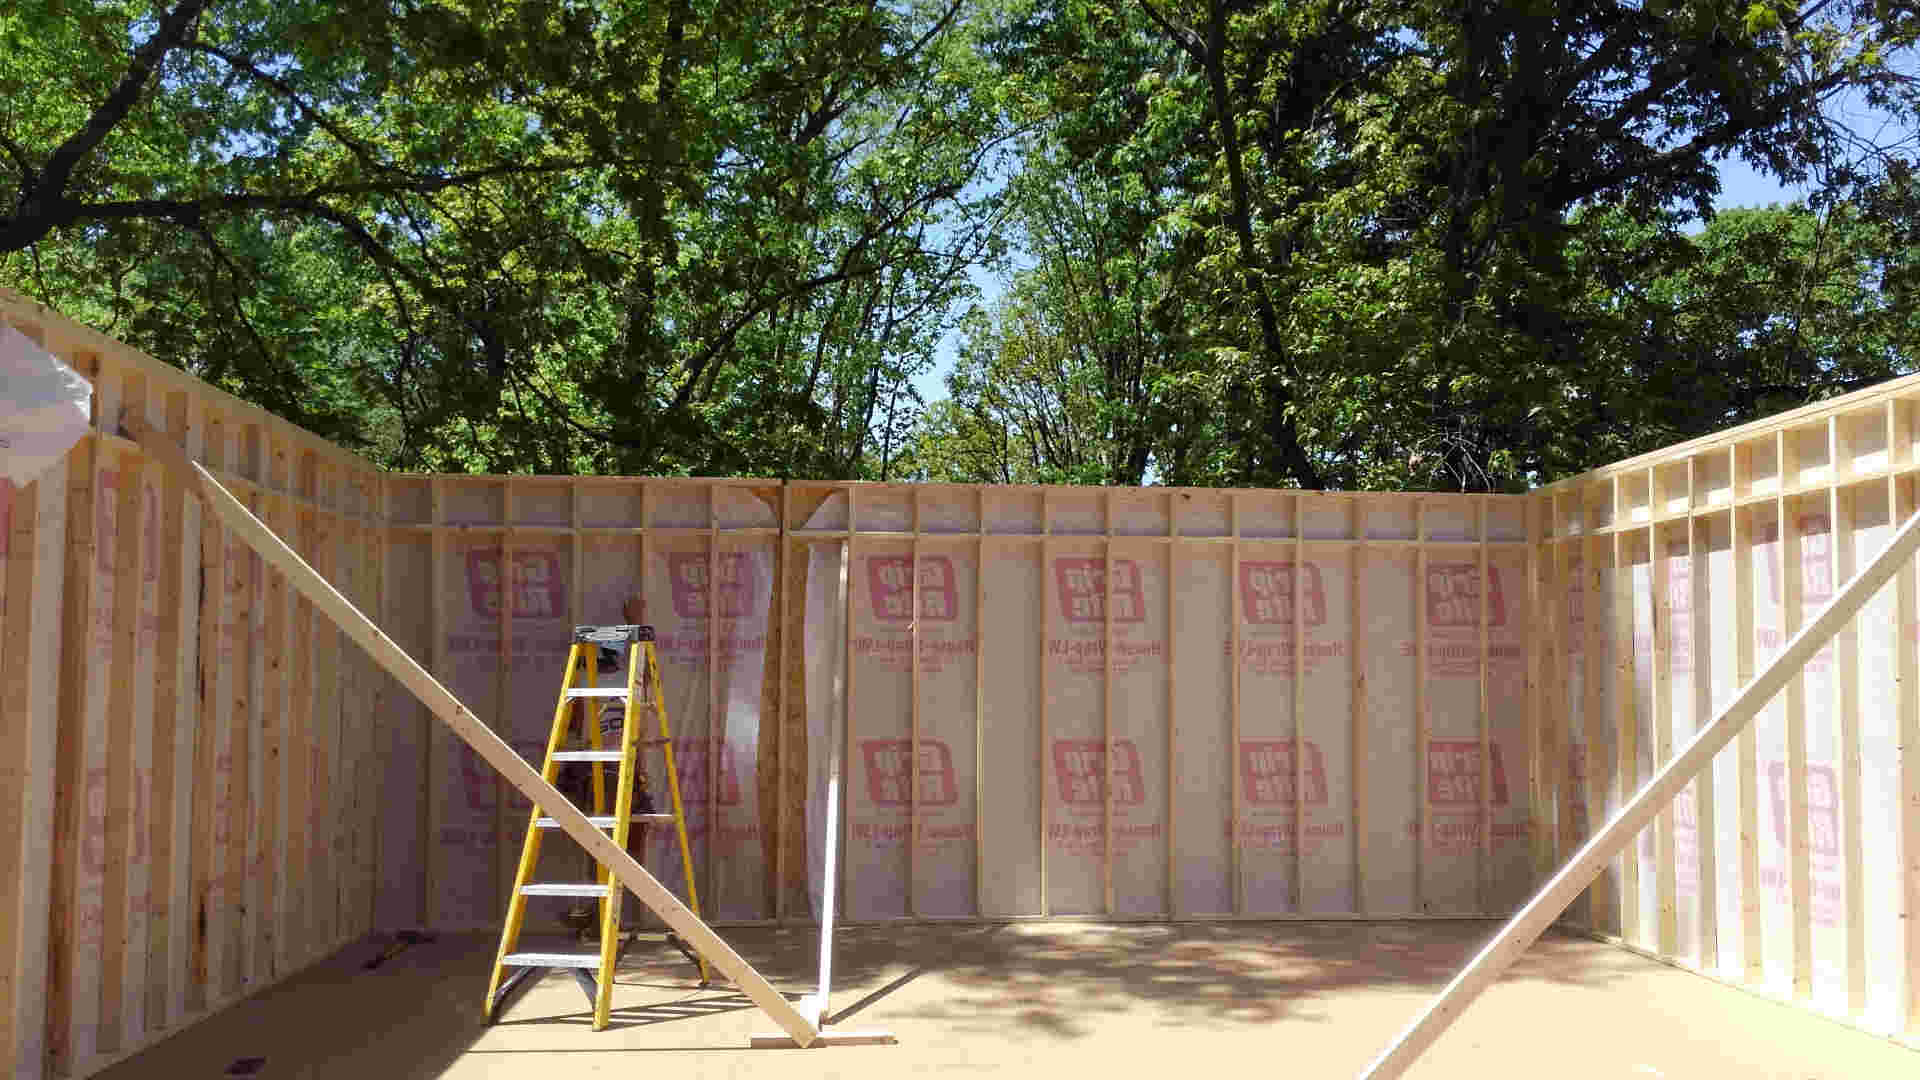
After assembling and leveling they took a break and went to their warehouse for the flooring. After lunch, they jumped right into installing the floorboards then started erecting walls. By the end of day two, they had the walls up and secured ready to receive the trusses. I don’t think I heard them say two words to each other.  They just seemed to know what the other guy wanted and when he wanted it.

While all this was going on, I watched.  It was hard for me to just stand on the sidelines and do nothing but then again, it was nice not to have to lift and hammer and generally stress my body.  Leaving it to the younger set was the right choice.

Construction Day 3

Thursday morning dawned bright and warm with a hint of clouds.  The weatherman said that we were expecting showers in the afternoon and that an overcast day was forcast.
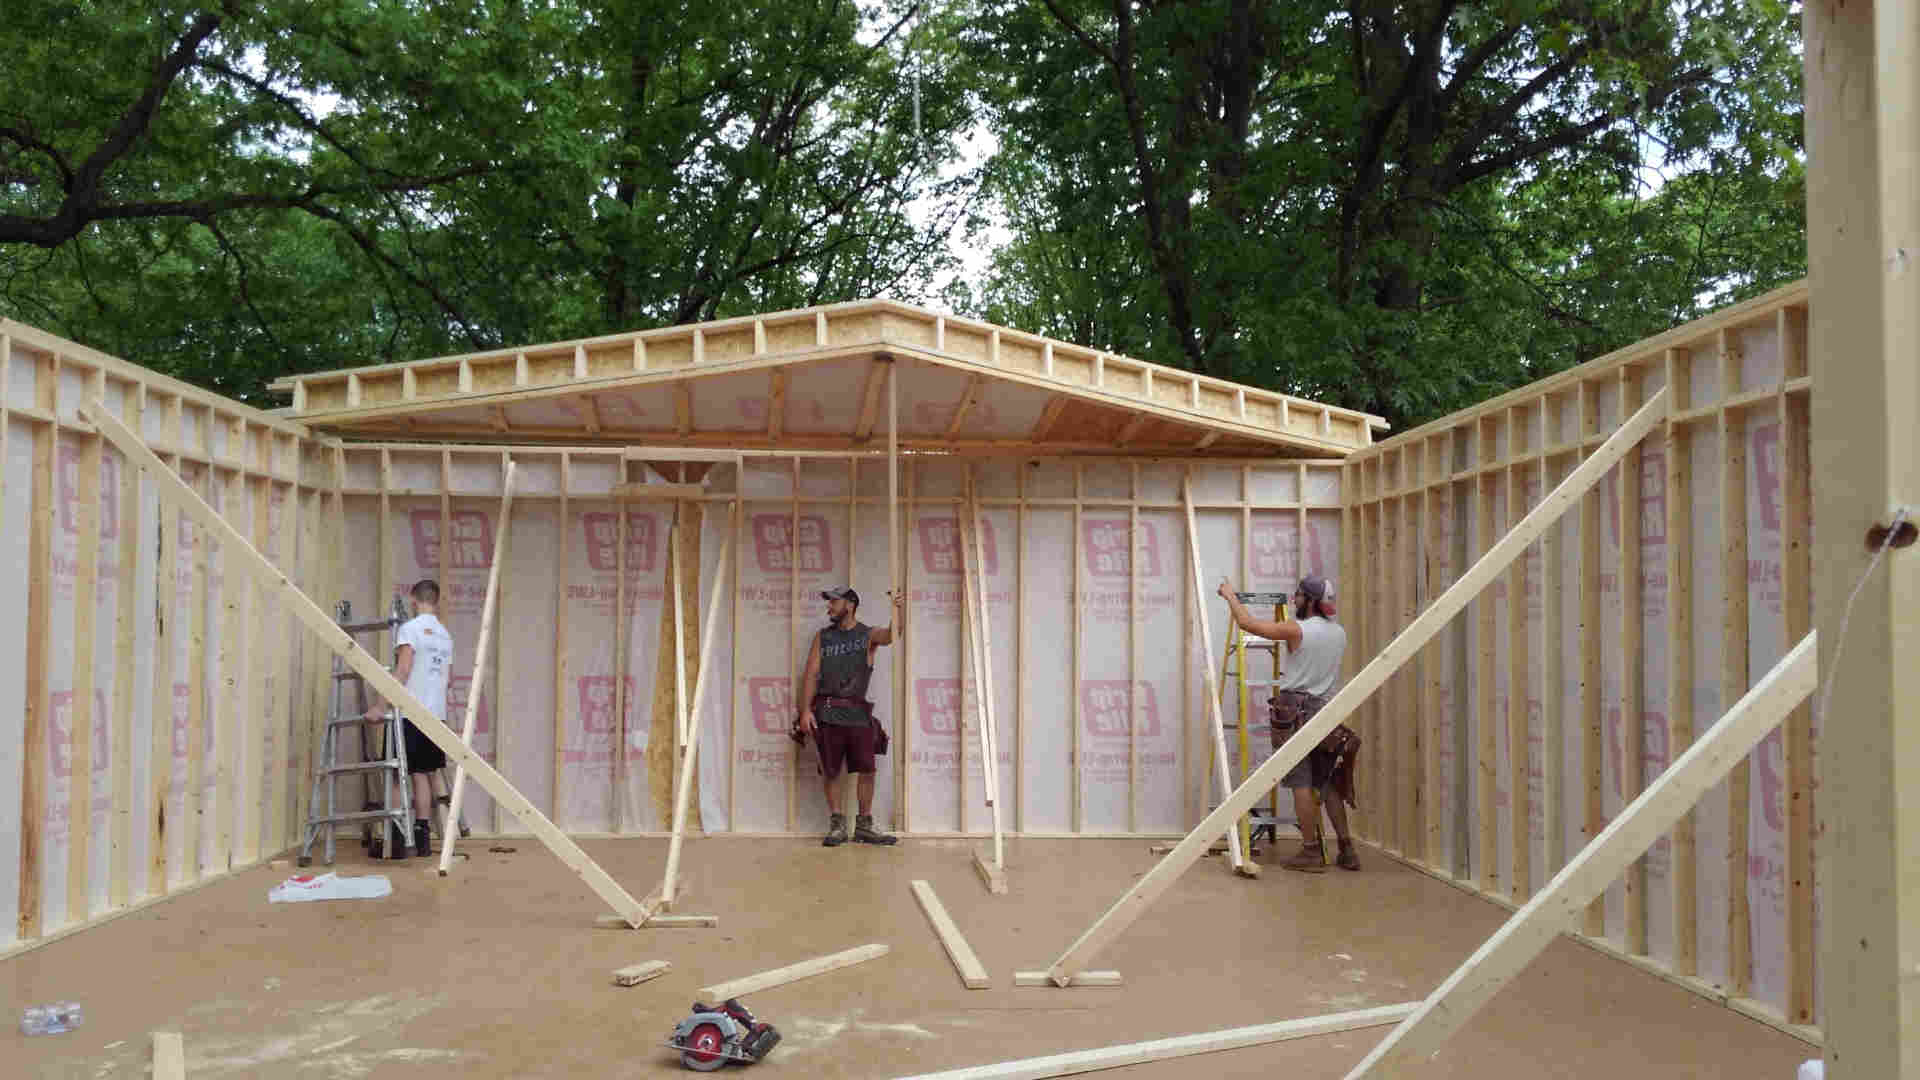
Workshop Setting First Joist

A third guy was added to their crew today. A younger man, he worked from the ground feeding things to the other two and generally being their ground man.  Today was the roof raising day.  First they built up the overhangs for the end walls and installed one of these on the back wall.  Then they started carrying and putting the trusses into their places.  They hand fed the trusses up to one guy on a ladder then lifted the other end up to another guy.  The third guy, using a long pole then would swing the top of the truss up to vertical where it was secured to a temporary beam that set the level and fixed it in place until the sheathing could be added.

It was all a well orchestrated process. While the weather was overcast, there was no rain.
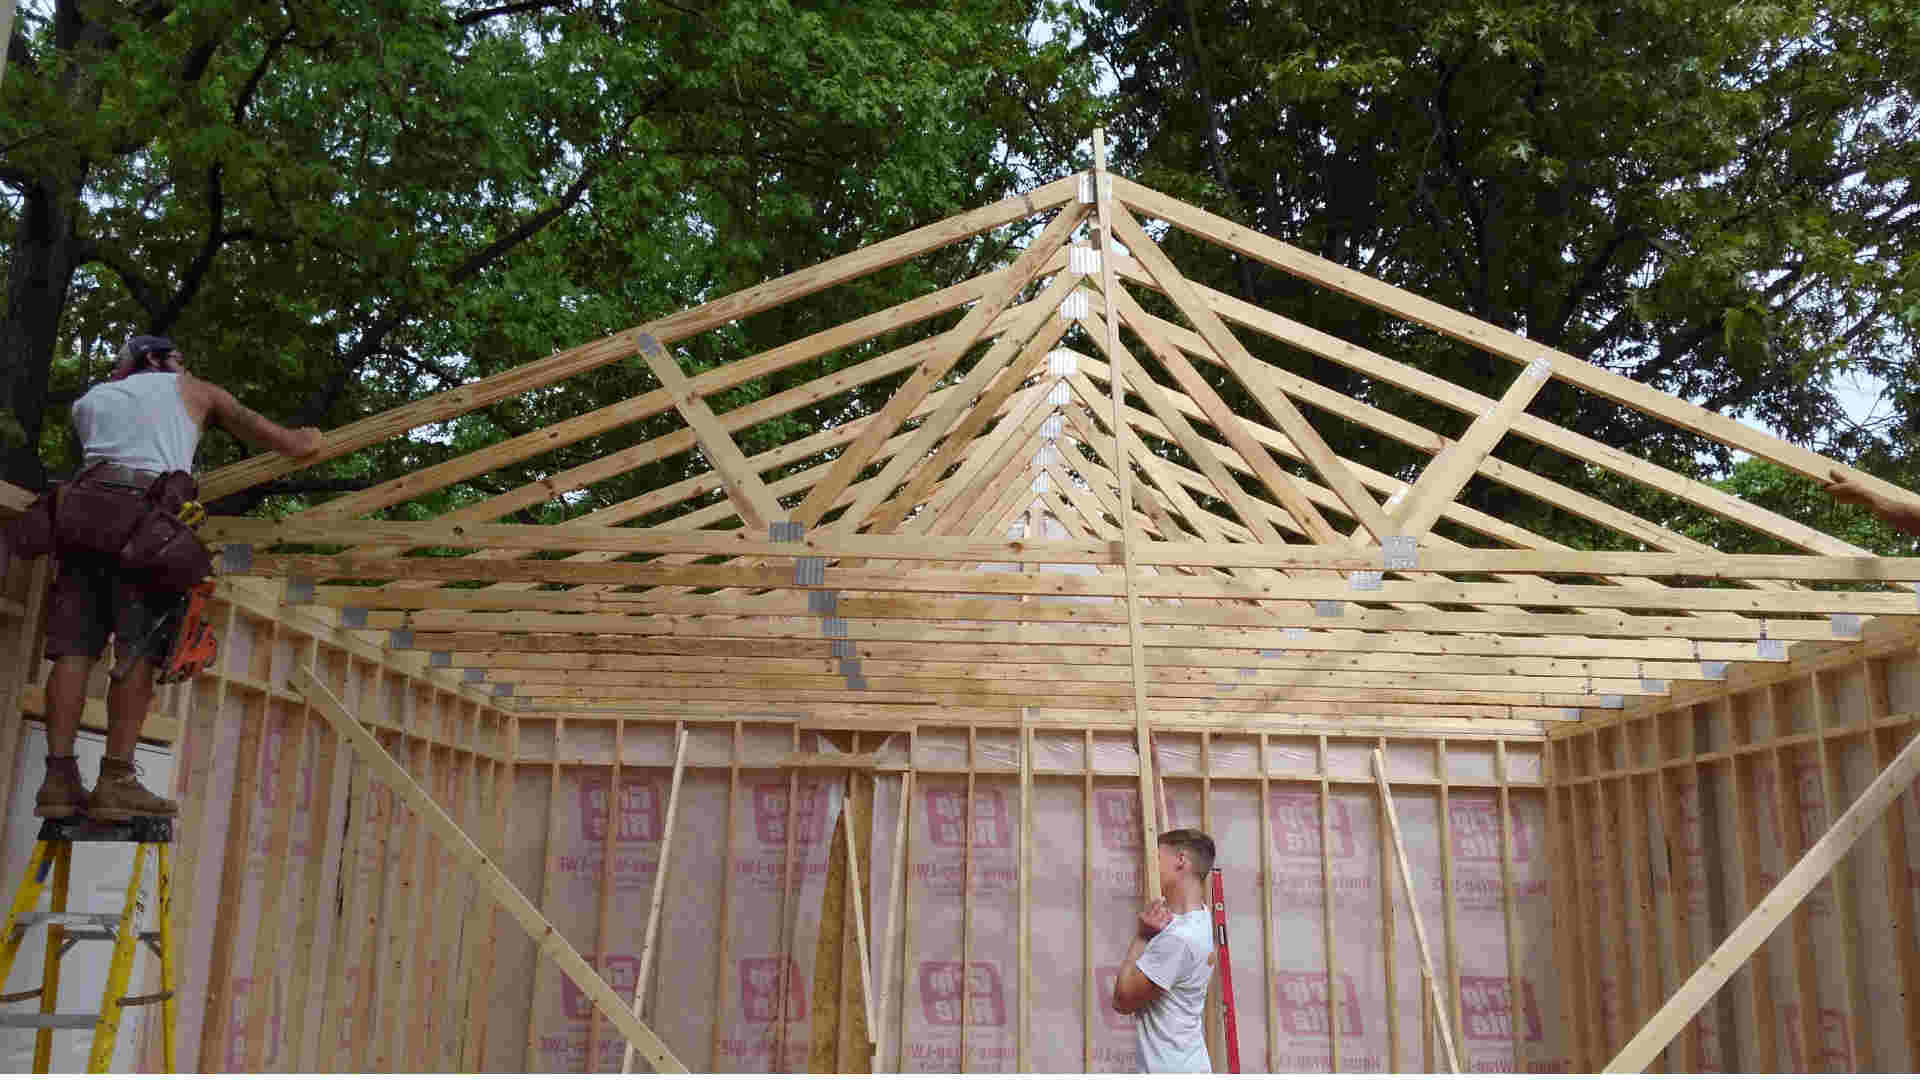
Workshop Setting Joists

Their noon break saw all of the trusses in place and the sheathing was ready to start being installed. The afternoon was spent nailing sheathing to the roof and installing the metal roof decking.  They finished the roof just as the sun reached the horizon.
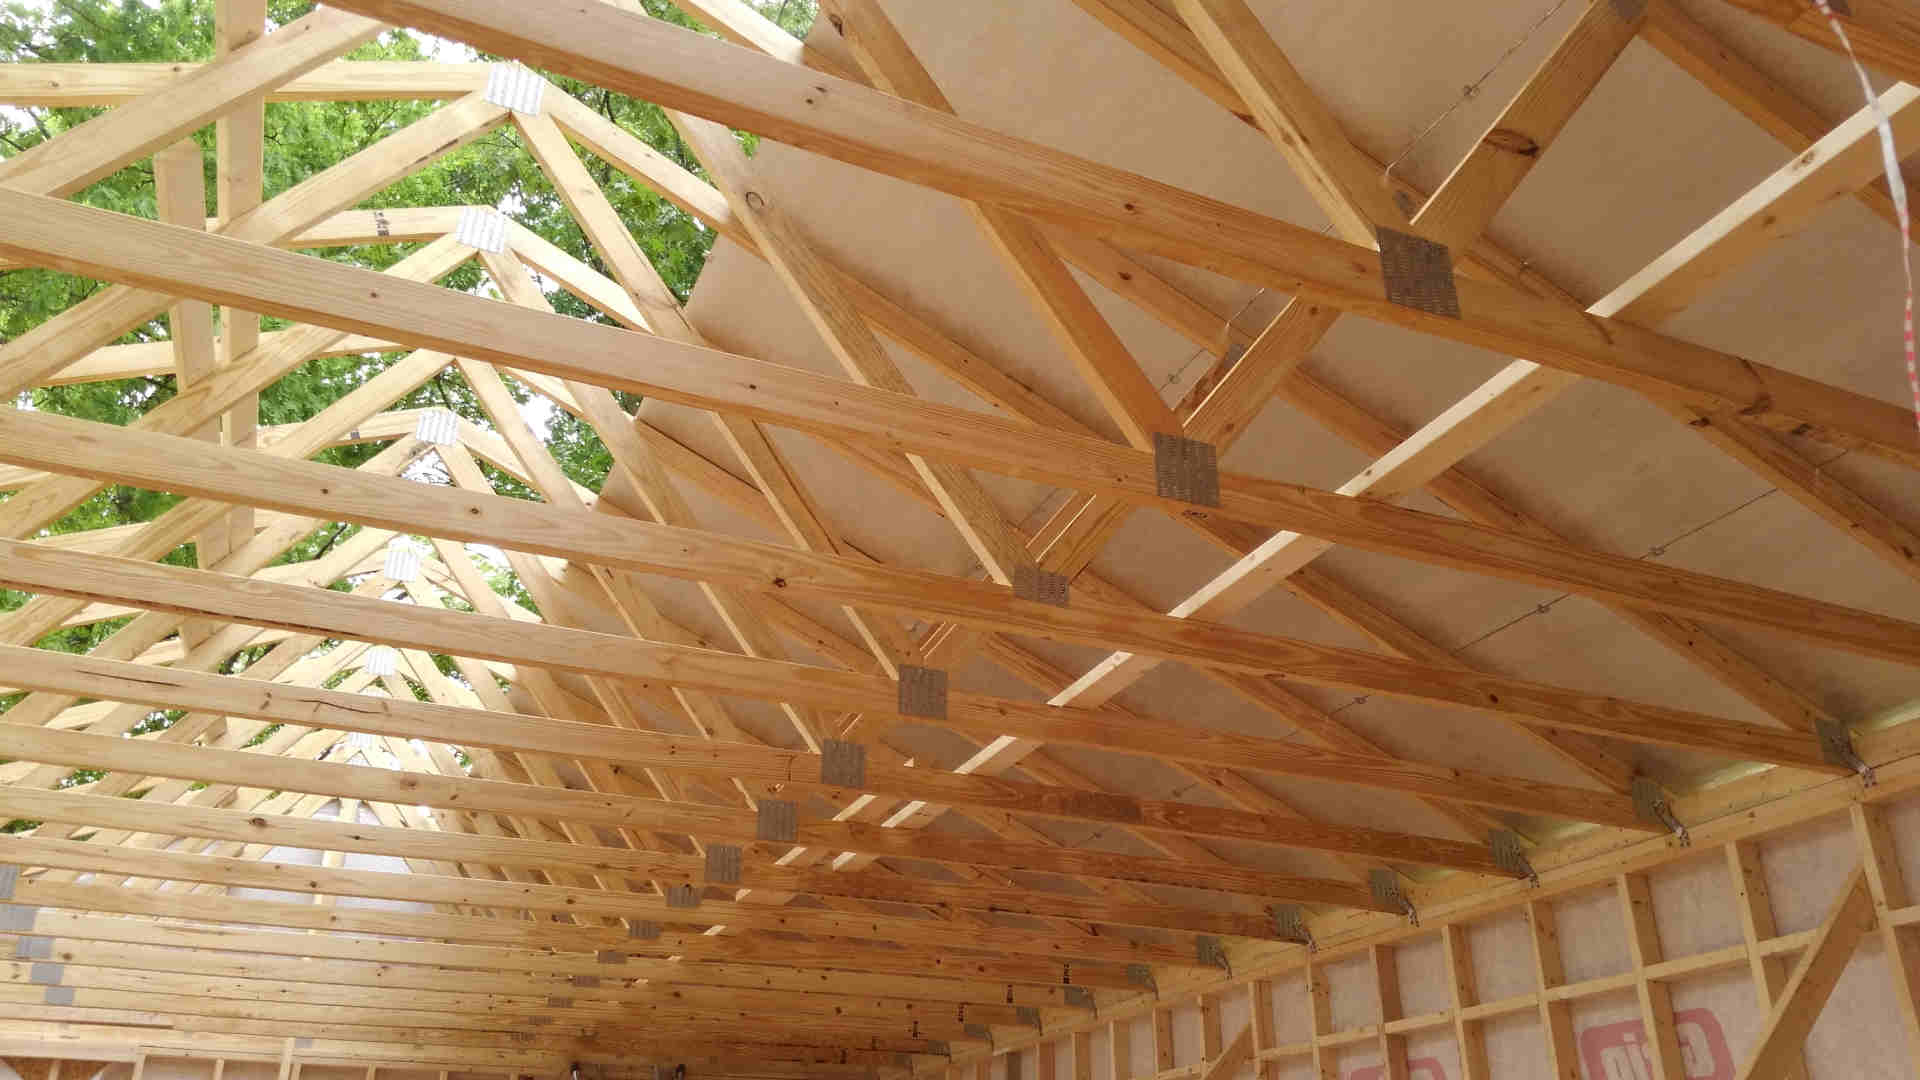
Workshop Roof Sheeting

An overcast day but fortunately the rain did not materialize.  I hate to think how slippery that metal roofing would have been with a coating of water on top.

Construction Day 4

Now that the shed was up, all that was left was for the trim to be installed and touch up paint to be applied.  Two of the guys worked on putting up the trim while the third one rolled on trim paint and touched up the main color.

Workshop Trim Installation

This process kept them all busy for about 6 more hours and by 2 in the afternoon, they were all packed up and ready to call it a day.

There were 4 pieces of trim under the gable ends that weren’t included in their shipment so they were unable to complete the full job.  They contacted their main office in Nashville and arranged to have the trim pieces shipped to the Knoxville warehouse.  Then they scheduled a warrantee installer to come out and install the pieces.

After 2 trips where the installer was unable to complete the job due to insufficient tools Tuff shed finally sent out the Knoxville warehouse manager who was able to complete the job.
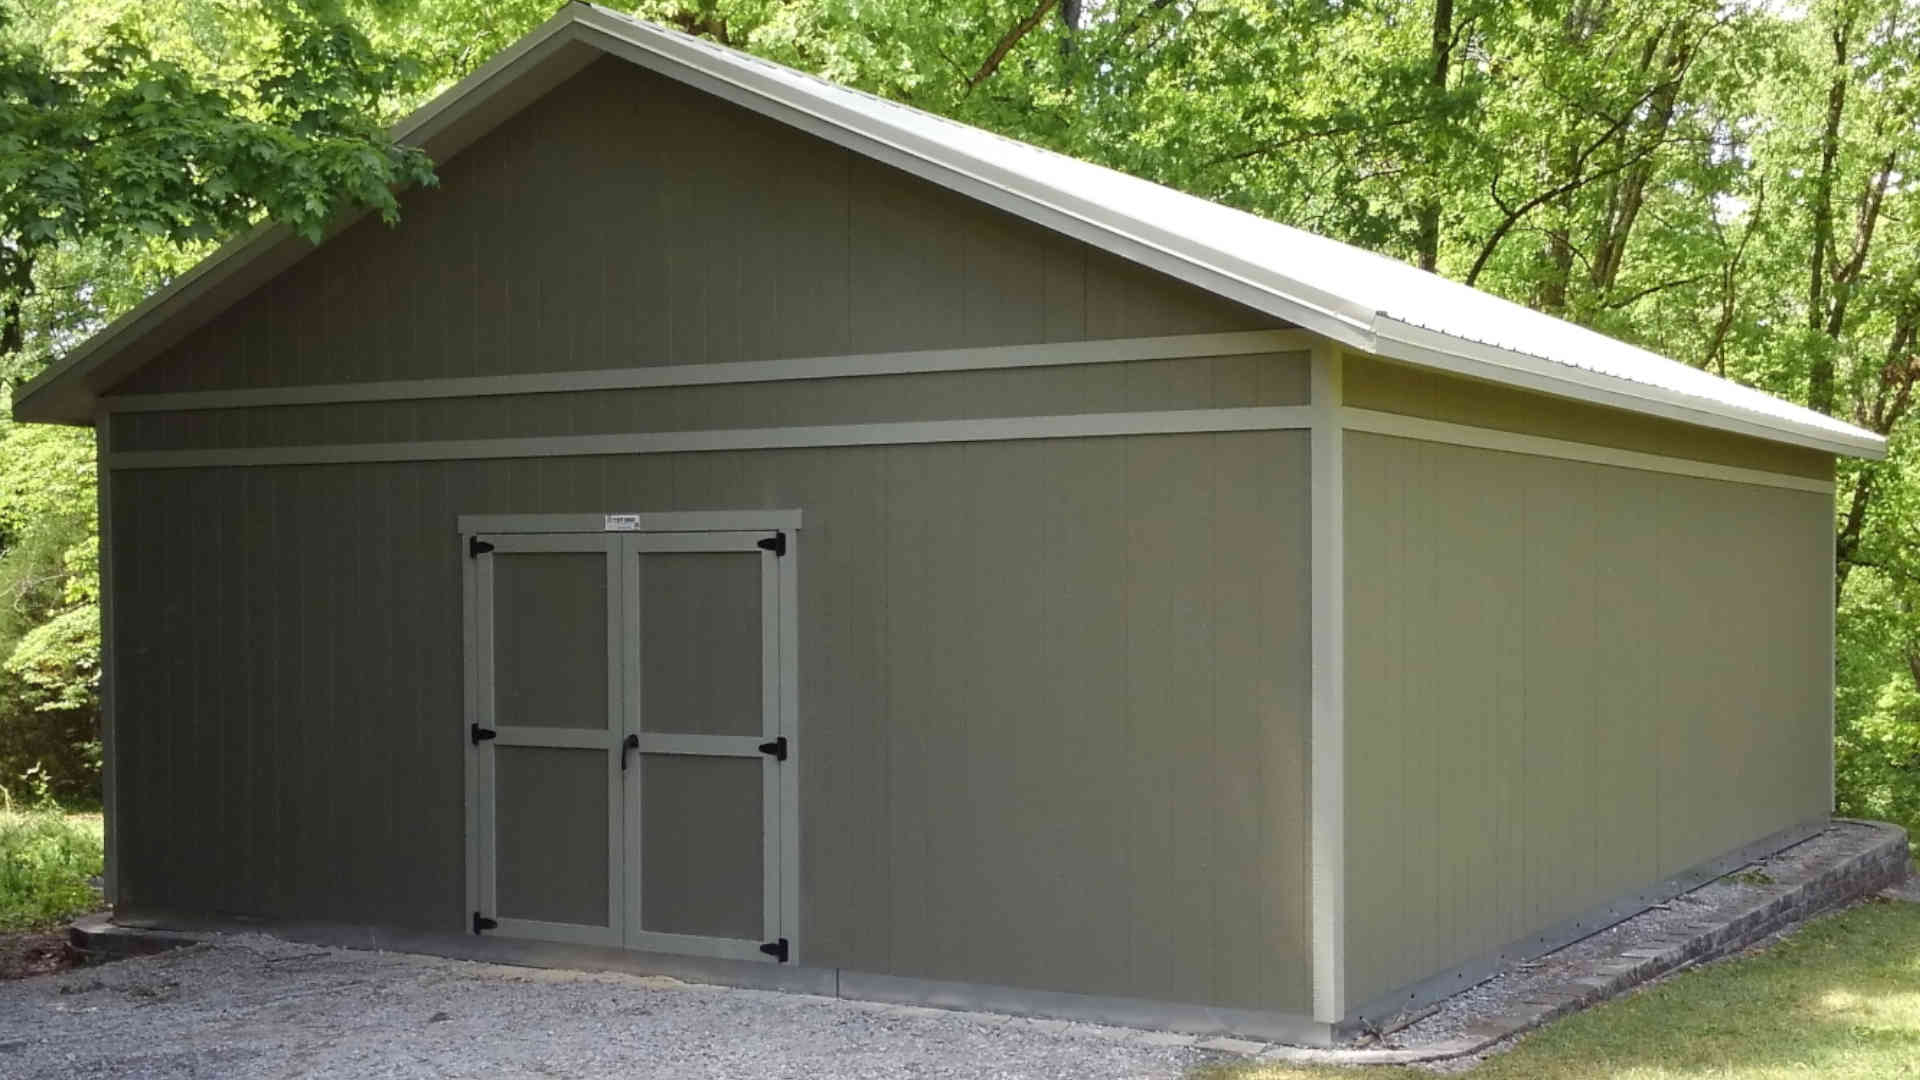
Workshop Completed Building

Results

Overall the Tuff Shed meets our expectations.  Getting the job finished and the quoting process was a major chore.  But once we were able to nail down the design and get the main office in Nashville involved everything proceeded smoothly.

The one problem that we ran into was the location of the man door on the side of the building.  It was located in the center of the building and we requested that it was located 8 feet from one end.  There is an existing concrete pad located directly opposite the door.  Eventually we will be using this for a finishing shed.  I wanted to make an entry to the pad from the back of the building so that it was isolated from where sawdust is generated.  Now, you will walk directly out the door onto the pad and there is a larger possibility to contaminate the finishing area with sawdust from the main shop.

The building, although the largest one that Tuff Shed has done, was well designed and went together with a minimum of modifications by the installers. If it weren’t for the salesperson here in Knoxville, the project would have been done in a very professional manner.

We were sent the drawings for the shed to provide to the building permitting office here in Knox County.  These were exactly what was needed to fast track the permit.  We needed to get an address for the shop so that the fire department knows were to go in case of emergency.  That went without a hitch.

Our next challenge is to get the building wired and electrified.

My next post will discuss the process we are going through to get this done.

The Foundation of a Business

For years I have wanted a full sized shop.  In order to do this we needed to find a place to erect the shop.  Of course, the location that we are able to get isn’t ideal.  There is a slope of about 18 inches from front to back.  So, it is time to put in the foundation of a business.  An actual foundation that the business can sit on and start generating real income. While this can be a wonderful metaphor for life, in this case I needed to create a structure to build my business upon.

Construction Concerns

Tennessee has a bit of an issue with an invasive insect known as the Formosan Subterranean Termite.  This rules out a foundation of wood. While Pressure treated wood is good for contact with damp soil and is resistant to these Termites, I chose to install a stone retaining wall and level the building foundation with stone.  There won’t be any issues with Termites eating into this material. The structure that we will be putting up sits on metal floor joists so on top of the stone, there will be another 6 inches of metal before the first wood. I am hoping that all of this non-edible material under the structure will be sufficient to create a barrier to these gnawing insects.  To fully protect the exterior I will be spraying with Timbor around the full foundation before installation of the building.

Design Considerations

I went round and round a couple of times tring to decide if I wanted the building to sit on concrete piers or on a gravel foundation.  The piers would have required building forms and pouring concrete into excavated holes.  This would have provided a good barrier to insect attack and make it easy to run any plumbing or ductwork under the floor.   Tennessee isn’t a horribly cold area in the winter so a minimum of insulation would be necessary to keep the floor warm in the winter.  The more difficult season is the summer.  A solid foundation of stone will keep the floor at a reasonable temperature in the winter and provide some cooling action in the summer as it will take a long time for the thermal mass to come up to ambient temperature.  

The Foundation of a Foundation

The start of the retaining wall is an excavation.  The lowest level of the block wall needs to be at least 1/2 a block (2 inches) below the surface of the ground.  The blocks need to be level and step down as the ground receeds from level.  They also need to have a strong supporting surface.  I chose to compact a level surface of 3/4 inch crusher run gravel 2 inches deep into the bottom of the trench that I dug.  

Finding Level

Before I could start on the trench, I needed to establish a level line.  Each corner of the foundation needed to be square and referenced to this line. I drove stakes into the ground just outside of the intended position for the retaining wall.  Each pair of stakes was connected by a 2×4.  This way, I could set the height of the line so that it was level and adjust the direction enough to get the stringlines square to each other.  I used a small level called a line level to determine when the line was level.  These are small inexpensive bubble levels that hang on Mason string.  Finally, I verified that all of the lines were at the right height with a laser level that I picked up at Lowes.  This self-levelling laser sits on a standard camera tripod and shoots a red laser out in 3 directions.  I used a folding ruler and measured up from the stringline near where I set the level to the laser point, then verified that the dimension was the same at random points all around the foundation.  The strings needed to be adjusted a bit to this line but when complete, I was confident that the entire outline of the wall could be set to the stringline and be level throughout the entire area. With the line in place, I measured down 4 inches and removed a trench 12 inches wide.  As the ground receeded from the line, I stepped the trench down in 4 inch increments so that I could add a full stone and keep the top of the wall level.  When the trench was excavated, I filled in the bottom 2 inches with the crushed stone and tamped it down loosely.   With the trench complete and mostly levelled, I started laying stone.  Each stone was placed and levelled with a 6″ torpedo level in 2 directions.  When a few were down, I checked the level with a 4 foot carpenters level.  Each stone needed to be individually tapped into place with a rubber mallet.  I added or removed the compacted foundation stone as needed to get each piece levelled in place. Then, it was rinse and repeat until all 180 stones were in place.  Several long days in the sun felt good to get these old bones working again.  Ok, I was sore for a week after this ordeal but, I got it done to my satisfaction.  Next up, filling the hole.

Building up the Foundation

Now that the foundation retaining wall was complete, I added a berm on the low side of the wall with fill dirt.  I covered this with sod that we removed from the inside of the foundation.  This should provide additional strength to the wall where it is 20 inches high.  The block is designed to lock together and should not require additional support under 24 inches but to be on the safe side, the additional support was added. The remainder of the fill dirt (About 4 cubic yards) was layered into the inside of the wall and compacted.  On top of this, I placed about 20 Tons of 2 inch crusher run.  This is a mix of 2 inch stone, smaller gravel and rock dust.  I compacted each layer to create a strong stable drainage under the foundation. The final 4 inches I added 3/4 inch crusher run.  When compacted this felt like walking on concrete.  The smaller crusher run stone was also easier to produce a final level to the top of the foundation. For the final level, I grabbed two pieces of steel conduit at Lowes and set them so that the tops of the conduit were level with the finished surface and embedded in the gravel.  Then I used a 2×4 with a straight edge to drag the gravel until it was a nice level surface.  Then it was just a matter of repeating the process until I had covered the entire area. Overall this was a very satisfying project.  I was able to borrow a front end loader to move the majority of the 50 tons of stone that went into this foundation.  I still worked very hard over 4 full weeks to get it completed and meet the schedule for the installation of the building.  I completed the work on Saturday, Trusses for the building were delivered on Monday and the crew with the building arrived late on Tuesday afternoon. Next up….A shop is installed on the foundation.

Building a Woodworking Business From the Ground Up

Everyone Has to Start at the Beginning

Many years ago I was staying with my Aunt and Uncle for the summer.  We were staying in a cottage that my Uncle was building.  There wasn’t much in the house.  We had to access the second floor with a ladder.  While there were beds, there was no other furniture in the bedrooms.

I decided that a shelf would be a nice thing to have so I went to the home improvement store and got a sheet of 1/2 inch plywood and a few 2x4s.  I sawed out the corners of the plywood and installed short blocks to hold up the corners of the shelf.  Only one problem, the 2×4 inch cutouts I made for the 2x4s didn’t look at all like what was needed.  I learned that 2x4s aren’t actually 2 inches by 4 inches (nominal size is 1 1/2 inch by 3 1/2 inch).  I also learned that 1/2 inch plywood is strong lengthwise but sags easily when flat unless there are additional supports added.

Having completed the shelving, my Uncle’s only comment was measure twice, cut once.  He was a man of few words but great wisdom. It was at that point that I decided that I would never build anything that poorly ever again.

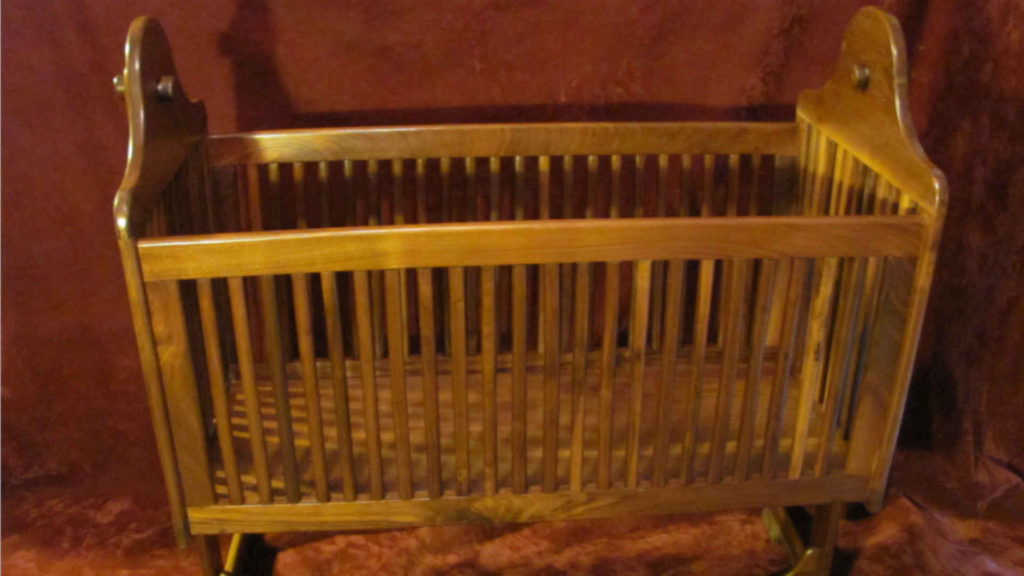
Here’s one of the projects that I completed in time for my daughter’s birth.  My skills have come a long way from that sad 2×4 shelf. 

That was about 40 years ago.  Since that time I have learned how to put wood together and build things.  I have built a couple of Canoes and some Trestle Tables as well as a myriad of smaller furniture pieces.  I have spent many hours making sawdust in the shop. From those piles of Sawdust, I have created many projects and developed a skill set that allows me to make pretty much whatever I desire from wood. In the process, I’ve developed a great passion for working with wood.

I decided it was time to make Woodworking a vocation.  It was time for me to create a Woodworking Business for myself.

Capitalizing on an Opportunity

In 2016 I had a life changing transition. During this transition, my special lady had Hurricane Matthew hit her parent’s vacation home on Hilton Head Island.  She asked me to help her with the storm clean-up and the renovation of the property.

Once the Island was reopened to owners, she flew down and rented a car to asses the damage to their property.  The house was unreachable.  Clean up crews had opened many of the roads but the fallen trees and limbs created a maze.  No landmarks were visible.  When she reached the house, it was totally surrounded by huge trees.  One blocked the driveway and several more created a circle around the house.  There was absolutely no way to reach the house.  Even climbing over fallen trees was impossible.

The next trip a week later was more productive as the landscaping company that took care of the property had opened up the driveway enough to get access and to park a single car off the road.  Tree crews were working everywhere.  We were able to assess the damage.  A huge volume of water had found its way inside the house and everything had started to mold.

Multiple trips ensued, we basically gutted all of the drywall from inside the house and remodeled the floor and several rooms.  Everything was made waterproof to ensure that we didn’t have to go through all of this again in the event of another storm.

A Focus on Wood

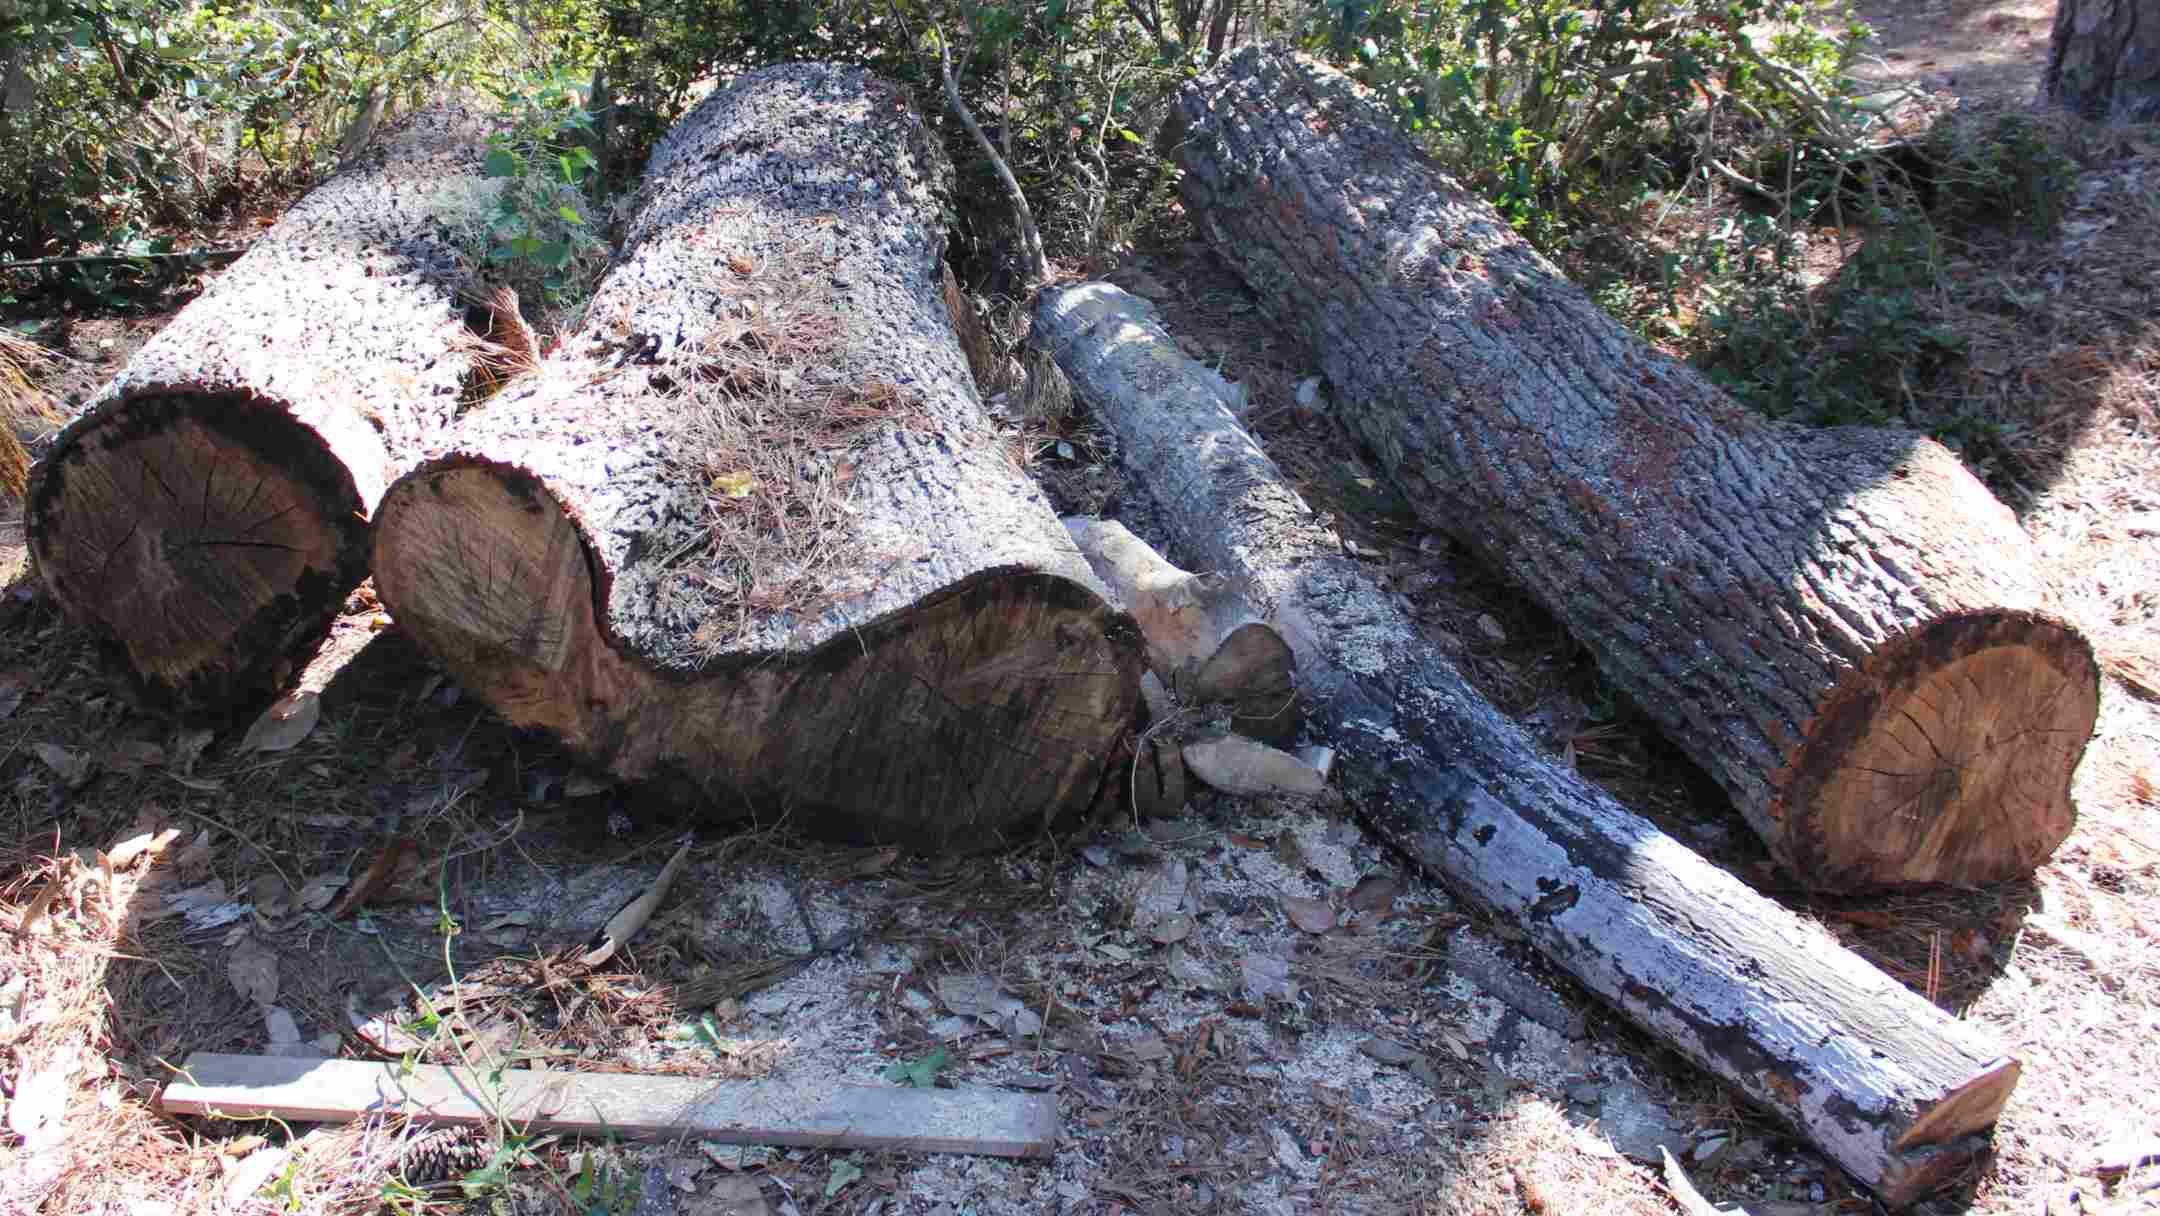
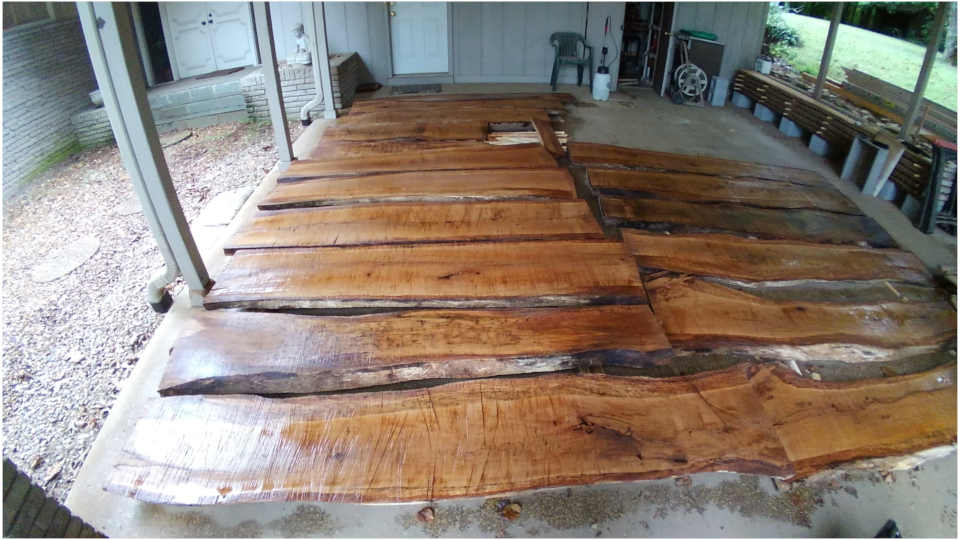
During the cleanup, all of the trees that had fallen had to be dealt with.  We were able to find a crew that had come to the Island from Atlanta and was helping some of the neighbors with their cleanup.  They consented to focus on our property for a couple of days and deal with our problem trees, all 15 of them.  I asked them to leave me 4 sections of Live Oak about 8 feet long.  Originally, I had intended for these to become a memorial piece in the house to commemorate the successful completion of the renovation.Live Oak Logs

With all of those trees just laying around, my passion rose to the surface and I needed to harvest some of that timber for myself. My focus was on creating a stock of wood that I can use for my business.  Since I’m starting on a shoestring, I need stock to use for my projects.  This was a way to build up an inventory of wood to use when I have my shop in operation.  The slabs will need some time to air dry so getting them cut and drying was my first priority.

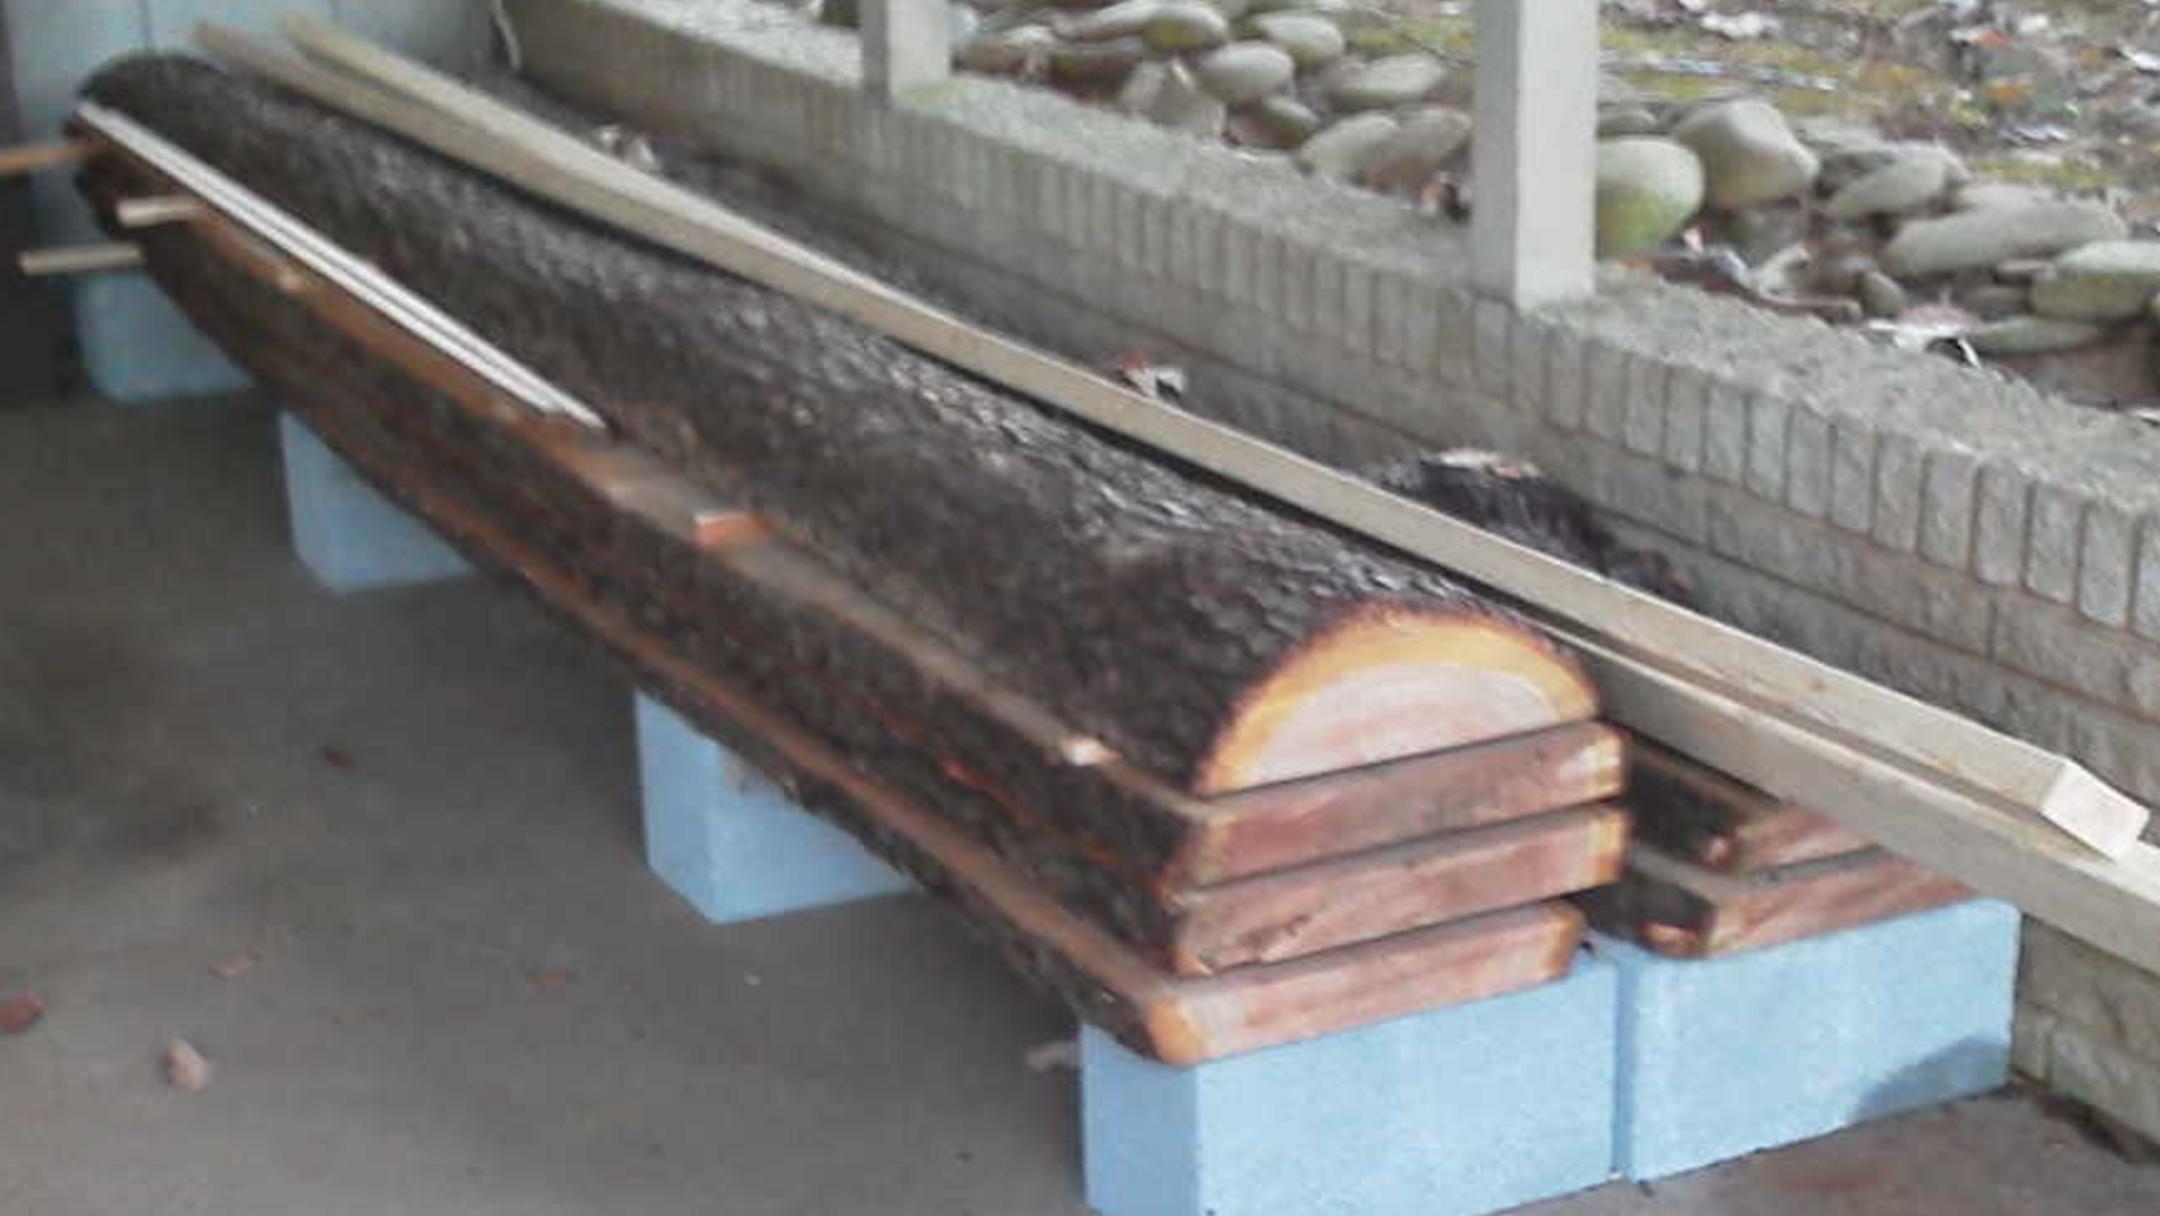
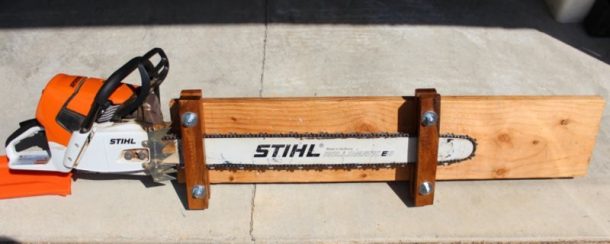
I designed an Alaskan Sawmill from David Groth’s design on YouTube.  He drilled holes in his Chainsaw Bar and installed threaded rod.  I tried to drill through my Stihl Chainsaw Bar but just ended up burning up 3 drill bits and never really making a dent in the Chainsaw Bar.  Apparently, the material that Stihl uses for their bars is harder than anything I have to drill through it.  I settled for a clamping system similar to that used by the Granberg mills and that seems to work pretty well.

I used this homemade mill to slab the Live Oak.  This took me most of a year to do. I was bouncing back and forth between New York, Tennessee and Hilton Head.  In New York, I was renovating my house to sell and dealing with Lawyers and such.  In Tennessee, I was trying to fine tune the Chainsaw Mill by cutting up a large Yellow Pine and a length of Cherry Tree.  Then in Hilton Head, we were coordinating the renovations and trying to steal time to work on the Live Oak.

When the house in Hilton Head was almost completed, guess who came to town.  Hurricane Irma.  Yup, this one wasn’t a wind and rain event by the time it reached the South Carolina coast. It was an 8-foot storm surge.  The island was flooded for several days.  Water again entered the house.  This time with all of the work we had done, there was little damage.  Everything had been waterproofed.  Still, we had to remove the pools of water and dry everything out again.  This was the last straw.  The house went on the market.

Two months later the house sold.  They wanted a quick close and we had 2 weeks to vacate the house.  I left Tennessee on Wednesday, after driving for 8 hours I got started on the milling.  I milled the remaining pieces of Live Oak on Wednesday night and all day Thursday.  Friday morning I loaded all of the milled wood onto a trailer and moved it back to Tennessee.  Saturday morning we got into another car and drove back down. We then rented a truck and packed the contents of the house into this truck.  The following Friday, we closed on the house and drove the entire thing back to Tennessee.  I call it the 10 days of hell.  But, we got it all done and all but one of the Live Oak logs were relocated.

Although the wood was free, I spent a huge amount of time milling this lumber into slabs.  I needed to purchase a rather expensive Chainsaw and a special bar and ripping chains to get this job done.  I have about 300 board feet of live Oak but the investment in time and equipment was substantial.  I am still well under the price that retail outlets sell these boards so ultimately, I have created a valuable asset.

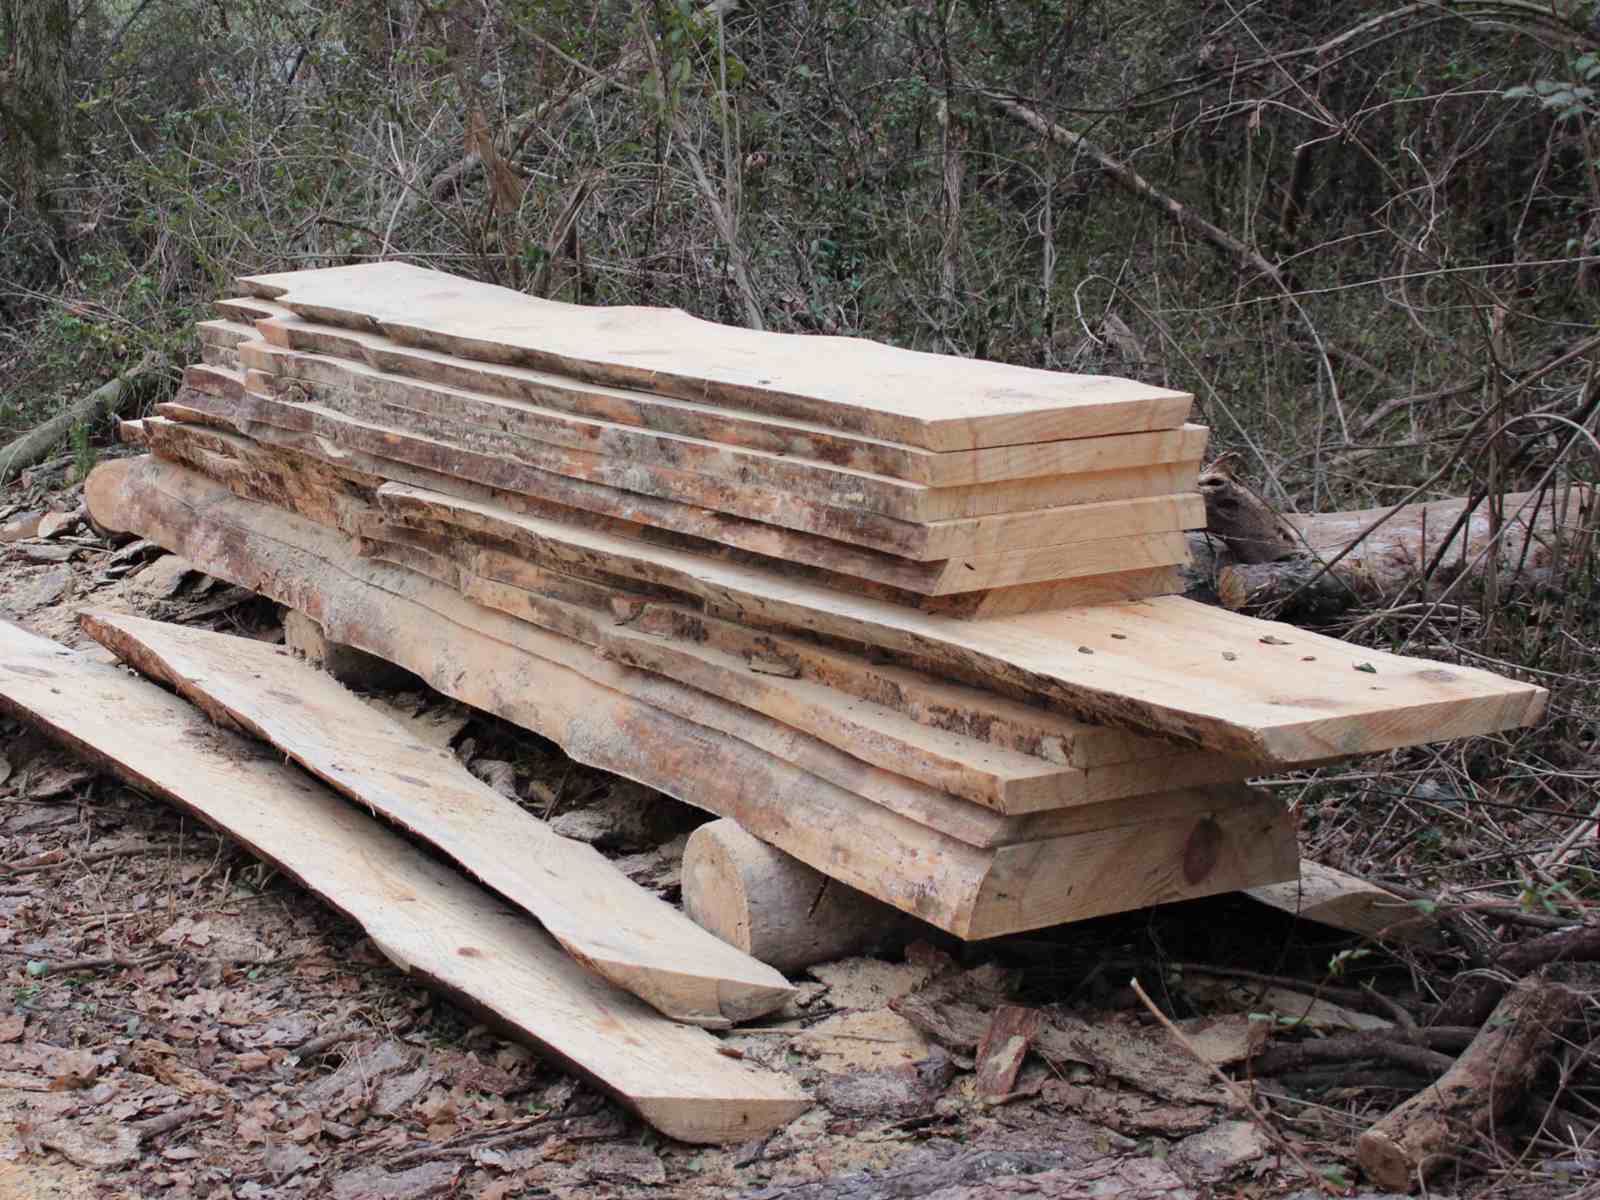
Over the year, I milled about 300 board feet of some nice clear Cherry, about 450 board feet of Yellow Pine, and 350 board feet of the Live Oak. Everything is stacked and stickered and drying nicely in the Tennessee sunshine.  I’m well on the way to building a Woodworking Business. 

Once all of the furniture had moved, it was time to do a few restorations of some of the furniture.  Two Teak outdoor chairs had to be cleaned and refurbished, a wooden garden bench needed to have the legs replaced and the entire thing needed to be reassembled and repaired.  We also had purchased some Shiplap that had been intended for a feature wall on the Island that never was installed.  This became a 5 ‘ Wooden American flag.  When all of these were complete, I made a couple of rustic benches from some of the Yellow Pine that I milled and then used a bit of the Live Oak to create a Sailboat Wall Hanging and a display stand with a partially live edge.

I was attempting to see what was doable in my current workspace.  A formal shop was not available so I made do with a couple of sawhorses made from 2x4s and a 2×6.  I had a single 110-volt electrical supply and a 400 square foot carport.  Challenging conditions but usable.

Keep following along with my story.  Soon I will have a nice size workshop and start laying out my workspace. I have made a down payment on a 24 x 32 foot shed.  After doing battle with a hedgerow, the location is cleared and ready to lay out the base for the installation.  Next, I will be laying out the foundation and getting ready to have the shed installed in its location.

I’d love to get your input into optimal layouts and what you think I should do to make the space functional and efficient.  Feel free to comment below.


Unique Live Oak Wood Display Stand

Christmas came around this year and I was still working on the Wooden Sailboat Wall Hanging.  I put that project on hold for a bit while I did my version of Christmas Shopping. Over the years my family has expected that I lock myself away in my shop, put a sign on the door (Elf at Work No Admittance) and come up with a unique Christmas present for each of them.

My job was simplified a bit this year as I the kids are all grown and “Gramps” doesn’t have a real shop anymore.  I still have one special lady that needed a gift and she said: ” I’d love to have a stand that I can display these special flowers of my mom’s.”

Of course, I couldn’t let that opportunity pass.   I came up with a Unique Live Oak Wood Display Stand for her flower arrangement.

In my mind, it would be 8 sided and have Live edges on 4 sides and finished flat milled wood on 4 sides.  The live edges and the machined edges would alternate.

I jumped right into the project by looking at the stock that I had available.  The live edge Live Oak slabs that I milled in 2017 and 2018 have been drying for a while and have reached a good point to begin working with them.  One piece, in particular, has been in an indoor climate controlled storage area for about a year.  This was at 8% moisture content.  I found my stock!

Cutting to Length

I am working with some very rough stock at this point.  I learned when I was doing the Live Edge Wood Slab Coffee Table that the best way to start was with the chainsaw.  I lopped off a couple of 18 inch long pieces from one of the live edge slabs and then sat down with my SketchUp program to determine the correct angles and the widths that I needed to cut to have the stock that I needed.  Ultimately I settled on 5 1/2 inches wide which would give me a 14 1/4 inch diameter Octagon.

Cutting to Width

Since one edge was rough and the edges and sides weren’t straight, I cut the widths wider than I thought that I would need to make a 14-inch diameter round (actually an Octagon).

I cut 5 pieces from the live edge board and 5 more pieces from one of the Live Oak Slabs that were stacked near where I was working.  The slabs were 18 inches wide and 2 inches thick.  I estimated that the stock would be thinner for the flat stock so I added a tall fence to my radial arm saw and resawed the 2 inch thick pieces in half after ripping them to their 5 1/2 inch width.

I still had to handsaw the small web between the cuts of the final pass as I couldn’t saw all the way through the 5 1/2 inches with the radial arm saw.  The next step was flattening so I wasn’t overly worried about the extra small rib left in the center of these pieces.

I did, however, notice that the radial arm saw wasn’t locking into 90 degrees.  This was due to the age of the Radial Arm saw.  Apparently, there were a few bearings or guides that are wearing out in this saw.  It made it much more difficult to make the precise angle cuts that I needed to make.  Fortunately, I caught the errors before they caused a huge variation.

Time for Some Jigs

Planer Sled

The first jig I needed was to allow the back side of the live edge pieces to be planed roughly parallel to the live edge.

Having cut these from a round edge, the inside edge is typically not parallel to the outside edge.  Some of the edges must be removed to make the edges even.

I started by making a carrier for the various pieces.  Just a board really longer than the pieces I’m working on.  Next, I arranged each piece on the carrier and adjusted the height of the piece until it was oriented as I needed.  I used wedges and hot melt glue to fix everything in place.

When I started to run the pieces through the planer one side was cut more than the other.  Eventually, through multiple passes, each piece was leveled and smoothed on the backside.

Angle Guide

I noticed that my Radial Arm Saw was not set-up correctly.  I have another saw in storage that is much better but for now, I’m working with a saw that isn’t locking into the angles I need.

I ended up cutting the angles for the 10 sided container (more on that in a bit) to 18 degrees so I needed a precise way to set 18 degrees both in the tilt and for miters.

I measured out the angle with my carpenter square and created a piece of 1/4″ plywood with the angles that I will be using.  Now I can set the saw against the guide and lock it down with confidence that it is where I needed to put the saw blade.

Router Circle Cutting Jig

For the top of the display stand, I decided to make a 10 sided cover piece to hide the top grain of the side pieces.

I needed to create a round inside edge for the decagon that is 14 inches in diameter.

Typically a router jig is used for this, I didn’t have my old adjustable router jig (It was left behind when I moved) so I needed to put together a quick jig that would allow me to cut a routed circle.

I grabbed the router base off my router and laid out the hole pattern of the base of the router on a piece of 1/4″ Luan Plywood that was at least 8 inches long.  I located the center of the router by striking 3 arcs with a compass around these points.

By setting the compass to a radius larger than half the distance between the points (which are 120 degrees apart) I was able to create a line intersecting where the compass points cross.  These 3 lines meet in the center of the circle. I measured across the bottom of my router and created a circle at this diameter.

Center Finding with Compass

From the center, I measured along one axis line to a point 12 inches away from the center and marked the pivot point for the router.  I can select anywhere along the center line for a pivot point.  In this case, I made a hole 5 7/8″ from the edge of the router bit.

I connected the edges of both the large circle and the small circle with a straight edge and cut out the shape with my bandsaw.  You could also use a jigsaw if you don’t have a bandsaw to make the cut.

Now I just needed to drill and countersink holes for the router mounting screws and a hole in the center for the router bit.

Router Circle Jig in Operation


Leveling the Live Edge Pieces

I fastened each of the 5 live edge pieces one at a time into the Planer Sled jig and took several passes through the planer until I had a 5/8″ thick edge on each piece.  I still had a rough edge on most of these pieces so once they went through the planer I still had some edge thickness variation.  That was fine, I had a plan to deal with the variation later.

I did go need to cut a straight edge on each of these pieces. I cut a straight edge on these pieces with my Circular saw and an edge guide.  I remove the smallest amount possible from each piece to just true up one edge.  I left them in the Planer sled and clamped the edge guide to the edge of my worktable with spacers under the guide to make everything secure and give me room to run the saw without running into a clamp.

Thicknessing the Flat Pieces

The flat pieces between the live edge pieces needed to be cut from the 8/4 slabs that I have drying in the shop area.

I cut these to a rough width that I could resaw in my Radial Arm saw.  I really don’t recommend resawing thin boards on the Radial Arm saw. In order to do this, you need to make multiple passes while the saw blade is adjusted significantly above the table top.  It is seriously nerve-wracking to have a 10-inch blade right at eye level.

You also need to install a tall fence to keep everything aligned, use push sticks to keep your hands clear.  Just for good measure I also attached a fingerboard that keeps everything tracking straight and against the fence.

Once they were cut in half, a few passes on the planer brought them down to their final 5/8 inch thickness.

Final Sizing

When I took stock of what I had done, I noticed that the widths of some of the pieces were not sufficient to create the 8 sided barrel that I had originally intended to create.  Some of the boards were considerably thinner than I had calculated for the Octagonal structure.  Not a problem.  I always prepare more stock than I think I will need.  I had 5 pieces with the live edge and 5 pieces that were flat on both sides.  Guess I needed to go back to the drawing board and recalculate angles for a 10 sided piece.

This is where the 18-degree angles come in.  With 18 degrees cut on each edge, my Octagon became a Decagon.

I trimmed all of the pieces to 16 inches long, calculated a width for the boards of 4 3/4″ on the wide side and 4 3/8″ on the inside of the piece after the 18-degree cuts were removed.

Glue Up

Because everything was irregular on the outside of the piece the only way I could secure everything during glue up was with ratcheting tie downs.  I laid them out on my tabletop with some long pieces of painters tape, I used the painter’s tape as a temporary holding clamp while I tightened down the tie straps.

I used Epoxy for the glue as I wanted good holding power when the clamps were removed. I also wanted to have lots of time to get everything aligned the way I wanted.  Epoxy seemed like a good solution.

The tape didn’t work out the way I wanted and the whole assembly fell apart a couple of times.  I finally used duct tape to hold everything while I aligned the edges and ends, made sure that everything was as tight as possible and tightened the ratcheting straps.

Whew. Everything worked out when the glue set.  It was touch and go for a while.

Sculpting

While everything seemed to glue together the way I wanted, there were some edges that didn’t really work well.  I decided that I would extend the flat sections of the outside edge onto the live edge pieces.  I mostly used a flap sander with a 30 grit sanding disc installed to meld the edges together.  Occasionally when there was a lot of stock to remove I started with the arbortech grinder and then refined the edge with the less aggressive sander.

Everything got polished with 100 grit sandpaper in an oscillating sander then finally completed with 220 grit for a nice smooth finish.

A  Decagon for the Top

I had a couple of pieces of long 3 inch wide strips of the Live Oak left over from the Wooden Sailboat Wall Hanging.  I cut these on the Radial Arm saw to make up a top for the stand.  I pulled out the Angle Guide that I made for setting the saw to 18 degrees and adjusted the angle to precisely align with the guide.  The Radial Arm Saw needed this extra step as the angle markings on the saw doesn’t line up with reality.

I edge glued all of the parts together after deciding on a pleasing grain pattern. Again, Epoxy was the chosen glue.  Wedges and cauls screwed down to the tabletop provided the clamping force that I needed to pull everything together.  I glued up 5 pieces at a time and then refined the last two joints with a flat belt sander.  This removed all of the variations in the angles.  5 pieces added up to 180 degrees or half of the entire circle.  This allowed me to only need to adjust 2 edges by a small amount instead of refining all 10 edges.

Routing the Center

I then installed the Router Circle Jig onto the router and installed the 1/4″ straight bit.  Inside the Decagon that I created, I screwed down a scrap piece of wood thicknessed to the same depth as the top.  I located the center of the piece by striking arcs from approximately the center of each flat edge in a method similar to that outlined above for the Circle cutting jig.

While the location wasn’t exactly centered, it was close enough that it appears correct.

I made multiple passes with the router each about 1/8″ deeper than the last until I was through the entire material.

I attached the top with more Epoxy.  I don’t want this thing to come apart as it ages.  I guess we’ll see how it does in the future.

A Cover for the Bottom

I traced the shape of the bottom of the display stand onto a piece of 1/4″ Luan Plywood and cut this out with my bandsaw. A simple glue joint holds everything together.  I refined the edges a bit once the glue was dry and touched up the raw edge of the plywood with a dark stain.  This creates a nice shadow line at the bottom.

I then added a piece of the cream-colored leather material that I used for the sails on the Wooden Sailboat project.  The soft material on the bottom protects whatever this piece is sitting on from scratches.

Finishing the Display Stand

Now that everything is assembled and sanded to a smooth finish, I decided 3  coats of my favorite oil finish would do the trick.  Tung oil makes everything sealed from the outside world but breathes so the wood can move as the seasons change or the humidity in its environment change.

I always start the finishing process by wiping down the piece with a moist towel.  This raises the grain and allows me to go over the piece with 400 grit sandpaper to start with a very smooth surface.  When the piece has dried, I sand it by hand and then go over it with a Tack Cloth to remove any residual dust.

I wipe on a coat of Tung Oil, wait a few minutes to allow the oil to be absorbed then go over the entire surface again.  I let this dry overnight.

The next morning I repeat the process.  Sand with 400 grit, wipe with a Tack Cloth and recoat the piece again.  3 repetitions is usually enough to bring out a nice sheen.

The Unique Live Oak Wood Display Stand Revealed

Now that the Live Oak Wood Display Stand is done, I have a dilemma.  I don’t know what to call this.  I have been calling it a Display Stand but it looks a bit like a solid wood basket.  It could be the pedestal for a table with just a piece of glass added for a table top. It resembles a finely finished stump from some angles.

I’d love to know what you think I should call this.

In any event, here is what I have created.  I hope you like what you see.  I know it was a well-received Christmas Gift.

Wood Live Oak Display Stand

Each side has a unique look to it. On the lower left of the above image, you can see where I leveled out the live edge piece to carry over the flat edge.

Live Edge Wood Display Stand side view

This image shows some of the characteristic grain (Ray Flecks) that is present in quarter sawn White Oak.

While this certainly was a challenge to put together, I am quite happy with how it turned out.  It will stay a unique piece.  Not only can’t I duplicate it exactly in another piece, I won’t take the time required to do this again.

Right now, this display stand is sitting on our hearth.  Inside we have placed a small piece of wood to support the Pelican Carving that I did last year.

I’d love to hear your reactions to this piece.  Please comment below and tell me what you think and what would you call it.

Wooden Sailboat Wall Hanging

Each tree tells a story.  Hurricane Matthew started a new story for us by bringing down a Live Oak on the property we were working on.

The character of the wood and the maritime location started me thinking that this wood needed to be celebrated in a something that looked like it came from the ocean.

Here you can see some of the character that we found when looking at the first cuts off the pieces of Live Oak.  Each piece has it’s own character.  Each piece has it’s own story.  These Live Oak Branches are twisted and knurled by the sea air, the wind and the water sculpted them into beautiful forms while they were alive.  Now that they are salvaged, it is time to breathe new life into them as a new maritime sculpture that can be enjoyed for many more years.

Live Oak Offcuts

I was looking at a few decorating magazines the other day.  One of these showed what appeared to be a window looking out over a marina.  The shape of the window was two sails of a sailboat.  Underneath was a hull made of wood of some sort.  This got me to thinking about the Oak and how it might be used to make something similar that would celebrate the wood.

Here’s a picture of the original piece that provided the idea for my Wooden Sailboat Wall Hanging.Wooden Sailboat Wall Hanging Original Idea

Selecting the Wood

I decided to use some of the Live Oak that I harvested in South Carolina.  This wood came down in 2016 during Hurricane Matthew.  I saved it in its raw form until early 2018 when I was finally able to get down there with my truck and the Alaskan Saw mill jig that I created.

I slabbed the remaining 2 branches from this tree and dragged the entire 450 board feet home to Tennessee on a trailer.  When I arrived I treated the entire stack of wood with Tim-Bor to make sure that I didn’t bring any insects or larvae home in the wood.  I did find some Wood Boring beetle holes in the sap wood of the trees and wanted to make sure there were no living individuals left.

Since the trees I used were actually branches from the Live Oak Tree (The base was too large for my tools to deal with) the grain just under the bark was all twisted and gnarly.  Just what I was looking for.  I had a 6 foot piece left after I created the legs for the Live Edge Wood Slab Coffee Table.

When I looked at the piece I had chosen it was still almost 6 inches thick in places and was too heavy to hang on a wall.  I needed some thin stock for the outlines of the sail and the keel section of the hull.  I decided to take another slab off the back of the piece to provide me with the extra bits of wood that I needed.

I attached the Alaskan Sawmill jig set for 1 inch depth and took another slice off the back.  Then I cut 3 inch wide strips from the offcut until I had what I thought was sufficient stock for the sails. The remaining piece was reserved for the keel of the hull.

Shaping the Hull

Joining the Keel to the Hull

The first order of buisness to create the hull was to locate where on the rough round the edge slimmed down to one inch.  I needed this to attach the piece for the keel.  I used a piece of wood and taped a pencil to it with wedges under the pencil to raise the point to precisely 1 inch then sketched along the edge creating a line on the wood 1 inch thick.  Using a reciprocating saw, I cut along this line to create a 1 inch edge that I could use to attach the keel piece.  This line was not straight but followed the contour of the rough hull edge.

Since the line was a bit rough, I created a template of the general line then smoothed the curves with a thin batten stretched around some nails.  This gave me a template that was roughly the same shape as the one I cut but more smooth.  Then using this template as a guide, I routed the edge to a smooth contour.

Now I needed to match the curve that I cut with the edge of the thinner piece reserved for the keel.  I used the technique outlined in the following video clip to match the curve and create a good mating surface for the two different boards.

The cut was complicated by the fact that only one side of the large board was flat and I needed this to be on top to give the router a surface to work from.  The bottom of the large piece needed to be stabilized so that it sat flat on my worksurface and then the thinner piece had to be supported at the right height to match the large piece.  I stacked boards under the thin piece and propped up the underside of the large piece with supports and wedges hot glued to my 3/4 inch plywood tabletop until I had it level and secure to work on the edges.

I don’t have a biscuit joiner so I couldn’t use one of these to reinforce the joint but I do have a slot cutting router bit.  I created another small template that has a half round cut.  I used this with the slot cutting bit to line up a few slots in the two pieces.  These were just the right size to accept biscuits.

I used West System Epoxy to glue the buiscuits and the boards together.  Due to the irregular shape of the main section of the hull the only clamping system that I could find to work was ratcheting tie downs.  These did a wonderful job pulling everything together to hold while the Epoxy set.

Here’s a picture of the completed cut and glueup with the clamps in place.

Wooden Sailboat Hull Glueup

Shaping the Hull

Next the hull needed to be shaped into something that resembled a boat.  My bandsaw will only handle up to 4 inch thick stock so that tool was out of the question to use for trimming the boat.  I had a similar problem with my sabre saw, just not enough length to the blade to make a full cut through this stock.

I finally settled on a Dewalt Reciprocating saw with a coarse woodcutting blade.  I sketched a line on the piece to give it some nice curves and went to town with the Reciprocating saw.  I gave myself a significant margin for error as I cut to keep from removing too much stock.

When I had all of the edges roughed out, I pulled out my Arbortech and ground the edges to a nice shape close to the line then refined the line with an angle grinder with a 36 grit flap sander disc mounted in it.  Dusty work but in the end I had a nicely shaped edge.

I used the Arbortech again to smooth the joint between the main piece and the keel piece working it down until I had some nice fair curves without removing too much of the original character of the main hull.

I followed up with the 36 grit sander then switched over to an oscillating sander working up through the grits from 60 grit to 150 grit.  I wanted a smooth surface that would take a nice finish but wanted to leave the original character of the outside of the log.

Here’s the result of the sanding. It is starting to look like a boat.

Wooden Sailboat Wall Hanging Sanded Hull

Creating the Sails

Design of the Sails

The length of the hull is 54 inches overall.  To balance the sails with the hull I decided that the tall mainsail needed to be of a similar height.  I divided the hull into 3rds and balanced everything until it felt right with the 54 inch height.  The base of the main sail ended up at 27 inches and the base of the foresail at 15 inches.  The foresail was shortened to 45 inches tall.

The angles for the Mainsail worked out to 26.6 degrees at the peak and 63.4 degrees at the base.  The Foresail angles worked out to 18.4 degrees and 71.6 degrees.  I laid these out in Sketchup and worked out how I was going to mate these together with a strong joint that kept everything flat and was sufficient to hold everything together.

Sail Joinery

I settled on the old standard Mortise and Tennon joint.  It provides a good glue surface to hold things together and since I was working with some fairly thin stock (7/16″) I didn’t think that dowels would provide adequate strength.

I cut a tennon on each end of the base piece angling the back edge to match the required angle and cut another tennon into the long back edge of the sail.  Mortises were cut into the adjoining pieces.  I wanted these to be precise so I laid all the angles out with a scribe and hand cut them with a Japanese Dozuki Saw. I then used a chisel to finish the cuts to the scribed lines.  This process only took a few extra minutes but in the long run with all of the complex angles, setting up the Radial Arm saw would have taken much longer and probably would not have been as precise. Sometimes hand work is the better choice for joinery.

Here is an image of the joints held temporarily in place with clamps to make sure everything was lining up well and testing the fit before glue-up.

Sails Ready for Glue up

To complete the glue up I needed a way to clamp the pieces together while the glue set.  Since I don’t have a good workbench, I just relied on some cauls screwed down to the 3/4 inch plywood that I’m using for a work surface.  I laid the short boards (soft pine to keep from scratching the edges) and inserted some wedges to apply pressure at the joints.  I used Titebond II to complete the glue-up..

Completing the Sails

The field of the sails needed something that looked like sail cloth.  I settled on a leather like cream colored material. I cut some luan plywood one inch from the edges of the sail frames and wrapped the leather around the backing.  I used staples to hold it in place.  A small bead of glue secured the edges.  The backing was then glued and stapled to the back of the frames.

The Mast

The mast was easy, Just a quick roundover on two sides with the router and it creates a nice shadow line between the sails.  I cut it to stick up  4 inches over the top of the mainsail.

The Finishing Touches

With everything complete, it was time to add some finish.  I wanted to give the grain a chance to show through to the finished piece.  I thought that the bottom of the hull needed a bit more definition so the first finish I applied was a dark pecan stain.  I outlined a nice curve from the front of the keel to the back with painter’s tape and added two coats of stain to the bottom 6 inches of the hull.

When the stain was dry, after removing the tape, I coated the hull and sails with 4-7 coats of Tung oil.  The outside of the tree absorbed all of the oil and had to be reapplied several times while the more finished heart wood of the keel section did not absorb nearly as much of the oil.  Eventually I was able to obtain a nice glossy finish on the entire hull section.  The sails and keel were glossy after only 4 coats.  The hull took 6 or 7 coats to reach the same gloss.

Hanging the Sailboat

With the hull and sails as separate pieces, they couldn’t be mounted on a wall using standard wires and eyelets.  I opted for a system called a French Cleat.  This system is two interlocking boards.  One board mounts to the wall and the other sets over the  first.  Gravity keeps the wall hanging in place.  A 45 degree angle cut into the top and bottom of each board interlock to pull the wall hanging toward the wall.

I mounted two of these interlocking boards on the back of the sail and another on the back of the hull.  The boards are designed to span at least two sets of 16 inch on center wall studs with room to adjust them back and forth to place them horizontally on the wall.

The Finished Wooden Sailboat Wall Hanging

Here is what the finished piece looks like.  I have a small dilemma though.  I don’t have a wall large enough to hang this piece.  I’m sure we will be able to find one eventually.  Perhaps it will look nice hanging in a gallery somewhere that has 14 foot walls (The overall height of the piece is about 72 inches).

Wooden Sailboat Wall Hanging Complete

In this image you can see the bow detail.  The grain of the outside of this log showed some distress cracks and a bit of the soft sap wood.  The overall grain seems to flow as if it is moving through the water.

At the bottom edge, you can see the stain highlight applied to enhance the definition of the keel and amplifying the grain.

Wooden Sailboat Wall Hanging Bow Detail

Here you can see the convoluted nature of the wood and how the grain patterns follow the twisted nature of these branches.

Wooden Sailboat Wall Hanging top of Hull

You can also see how the clear heartwood of the Oak interacts with the wormy sapwood (The Darker Wood).  I was trying to make the play of the lighter and darker wood tones work well to accent the height of the sails and create a feeling of movement in the sails themselves.Wooden Sailboat Wall Hanging Perspective from top of Sails

It always amazes me what kind of effects you can get from the interplay of the grain with a wooden item.  I think that overall this piece works well to create the feeling that I was hoping for.

I’d love to hear what you think of this work.  Feel free to comment in the area below.

Stay on Top with Woodworking Warrior

Join the mailing list to receive the latest news and updates from us!

You have Successfully Subscribed!

Pin It on Pinterest