Sawhorses are one of the first things that most people will build when setting up a workspace for woodworking. They can serve to raise things up to a nice working height or even to provide a place to store boards in your shop so that they are off the floor. Where they really shine is as a temporary work table or used as an assembly table or temporary workbench. As I mentioned in the article on Woodworking Work Tables my first workbench was a set of saw horses with a piece of three-quarter-inch plywood sitting on top.
I’ve built many different types of sawhorses over the years. The one thing that always gets stuck in my craw is that they get in the way when you aren’t using them. Lots of people will make folding sawhorses that can be tucked out of the way when not in use. The problem with folding sawhorses is that they aren’t very strong.
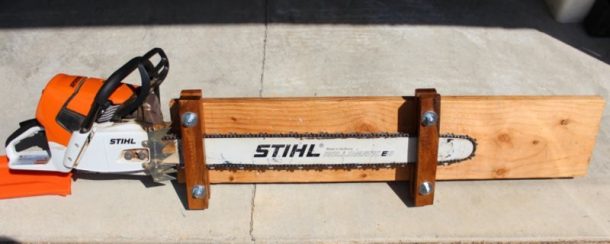
I’ve found that a trestle style sawhorse works well when it needs to be tucked out of the way as well as when it is in use. To make a sawhorse that is the ultimate adjustable sawhorse, a trestle style is the initial building block.
No matter how hard I tried, I could not get all of the equipment in my shop to be at the same height. My table saw and my radial arm saw are both set at 35 in. The bandsaw, however, is just over 38 in. Since I’m handling large boards I’m constantly in need of an in-feed and an outfeed to the various machines. I decided that a set of saw horses that could be adjusted up and down and have the top replaced with a roller would make a wonderful solution to my problem.
The Ultimate Adjustable Sawhorse Design
My solution was to design a set of trestle style saw horses with sliding sides. I considered a sliding dovetail but realized that that would be much more difficult than I was ready to take on. Instead, I just created a groove in one 2×4 and a recess in another 2×4, this seems to be a good enough guide to keep everything aligned during adjustment. For the adjustment, one of the two-by-fours gets a line of holes 1 inch apart, the other 2 by 4 gets a line of slots 3 in Long. This arrangement allows for adjustment in the height that is very versatile.

I decided to use my new router table and the height adjustment gauge that I created to lay out all the slots and mortise and tenons as well as the grooves. I used standard construction grade lumber to build the sawhorses.
Building the Interior Frame
I started with the two uprights for the inside of the frame. This piece needs to have a raised center section and recesses on either edge of the lengths of the two by four. I set up a 3/4 inch router bit and cut a ⅝” deep groove along each edge.
On the backside, I laid out mortises for the cross pieces. I cut these mortises with 1/2 inch router bit and made them three-quarters of an inch deep. On the lower end of this piece, I created a tenon that will fit into the foot of the trestle.
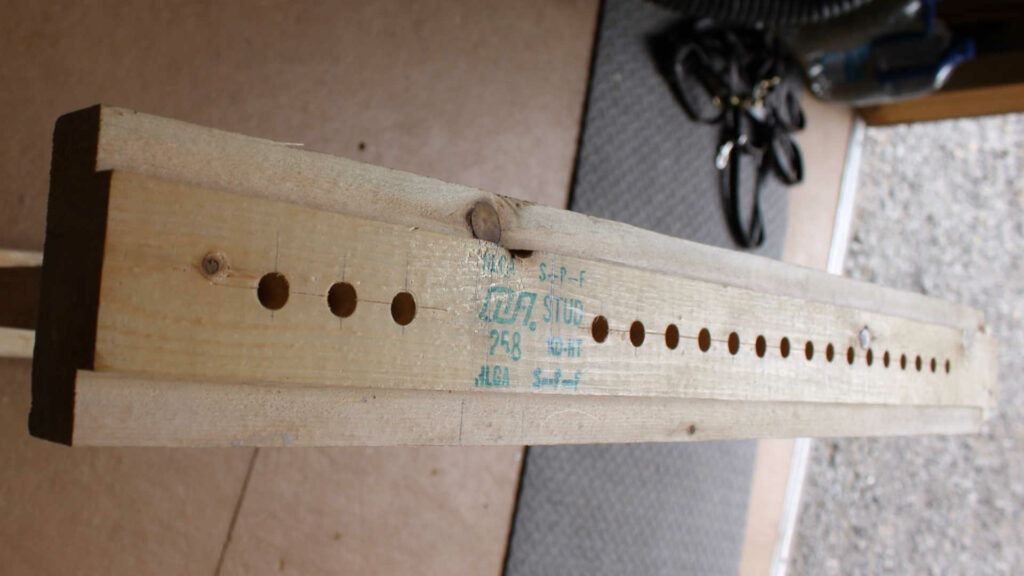
The last step for this piece was to lay out a series of 3/8 inch holes spaced 1 inch apart. I made sure to skip the area where the tenons for the cross pieces were cut.
I, of course, made four pieces at the same time. I needed two sawhorses and each one has two uprights. To minimize the change of setups, I created all the pieces at once.
Making the Cross Pieces and Feet
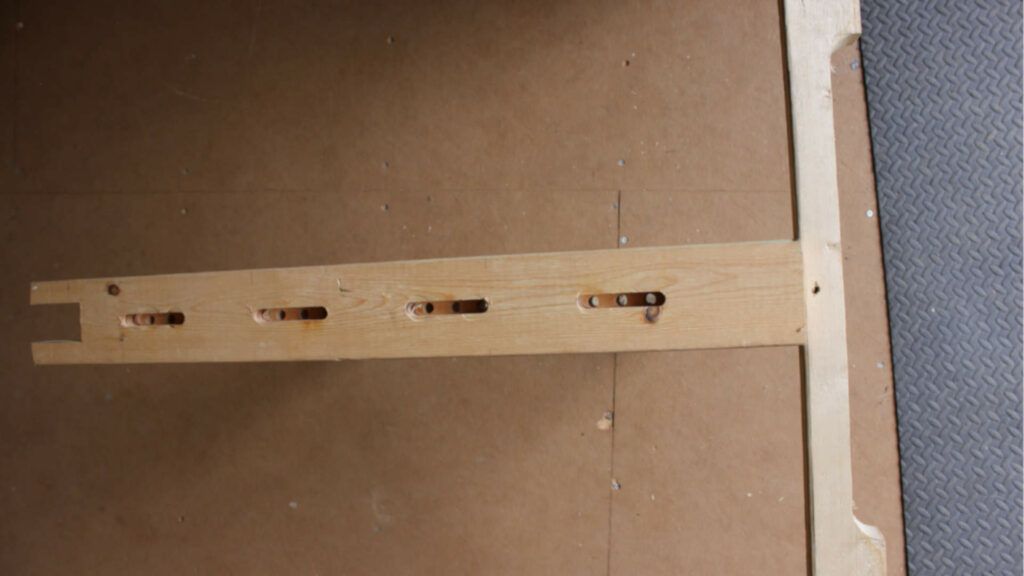
For the cross pieces, I started by ripping 2- two by fours in 1/2 lengthwise. This created the four cross pieces that I needed for the two sawhorses. I cut a tenon on each end that fit the mortise that I had already cut in the uprights.
For the feet, I took another two by four for each foot and cut a centered mortise in the top to accept the tenon from the upright. I also cut a recess in the bottom of the foot leaving a 3in foot at either end and cutting a recess from the bottom of the two by four with a straight center. Basically, I just wanted to raise the bottom of the two-by-four off the ground except for two 3 inch feet at either end.
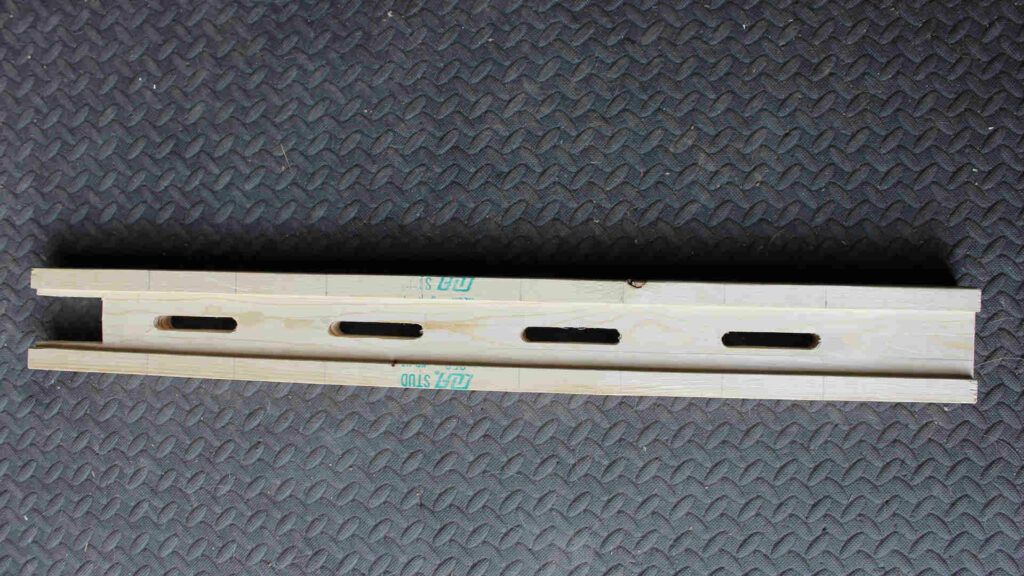
Building the External Uprights
The external uprights need to have a groove cut into the center. This groove needs to be exactly the same depth (or just a touch shallower) as the grooves cut into the internal uprights. The width also needs to be precise with just a little bit of play so the groove will fit over the inner upright. The groove can be just slightly shallower so that when they go together the meeting pieces have lots of friction to hold them in place.
I set up the router in the table with a three-quarter inch straight cutting router bit again. I used the depth gauge to center the groove and made several passes with the router bit to cut out an inch and a half wide groove in the two by four.
When I had this groove fitting nicely on the inner uprights, I changed over to a half-inch straight cutting router bit to cut the slots. I laid out a series of slots in this piece that were 3 in Long and separated by 3 in. This allows me to be able to slide the outer upright along the inner upright and have a slot always lined up with one of the holes of the inner upright.
When the slots were all cut, I cut a two and a half-inch deep by inch and a half wide slot at the top end of the outer upright. This will receive the crosspiece for the top of the sawhorse.
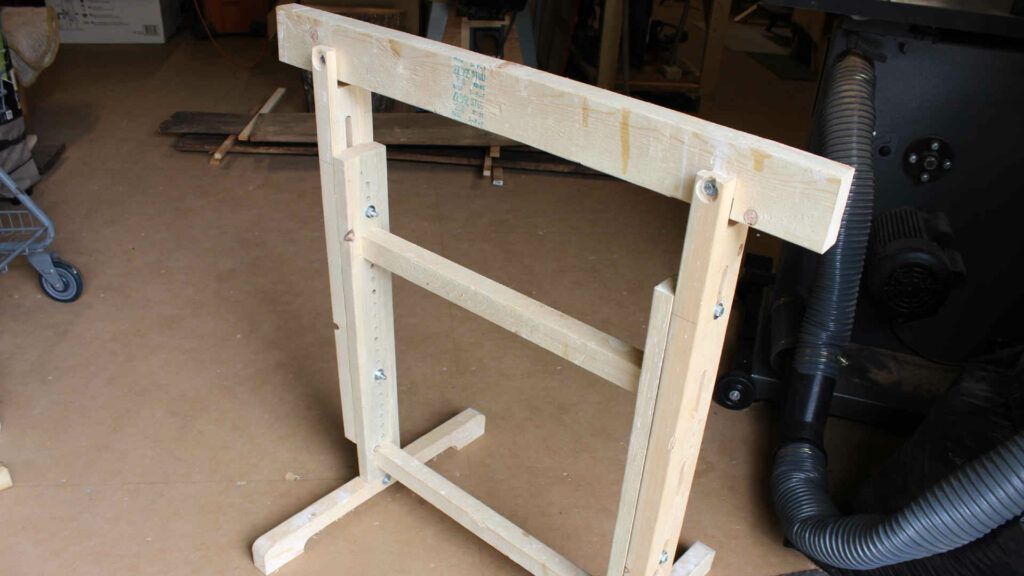
Assembling the Sawhorses
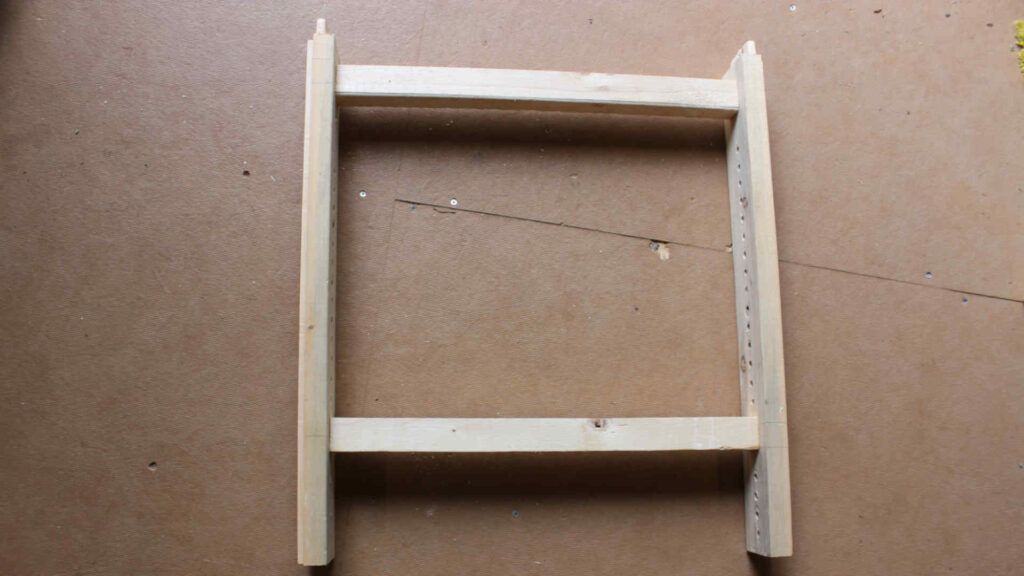
Now that all the pieces are cut, we can start fitting the pieces together. Start with the cross pieces and the inside upright pieces, fit the tenons from the cross pieces into the mortises. With the router, you create square tenons so they need to be rounded at the corners to fit into the mortises. Alternatively, you can square up the mortises with a chisel to fit the square tenons.
Once you have everything assembled just check for square and you can hold them together with some pipe clamps temporarily or wrap a couple of bungee cords around them to hold them together.
Do the same thing for the feet fit the interior upright tennons into the mortises.
Check to see if everything is square and parallel if so, you can apply glue and put everything together and clamp it with some pipe clamps. You may find it it’s easier to clamp the feet on with a ratcheting tie-down.
When the glue is dry, place the exterior uprights on to the interior uprights and clamp them so that the tops are about even. Install a couple of ⅜” machine bolts with washers through the slots and then the holes on the interior uprights and snug them up with your fingers.
Cut a cross piece for the top of the sawhorse out of 2 x 4 material and place it in the slots at the top of the external uprights. I cut mine 36 in Long. Drill and countersink for washers a couple of quarter-inch holes to accept a quarter 20 bolt to hold the top of the sawhorse in place.
Once you tighten the four bolts that hold the inner uprights to the external uprights you should have a nice solid sawhorse that’s ready for use.
Alternate Top for the Sawhorse
I needed a roller stand to help feed a jig that I made into the Bandsaw. I created a roller from a 1 1/2 inch PVC pipe and a couple of plugs that I turned on the lathe to fit the ends of the PVC pipe. This roller needed to have a recess to fit a guide for the miter slot on the Bandsaw. I used a 1/2 inch threaded rod to hold everything together and fastened it in place on top of the sawhorse.

I used several tools to create this project:
These links are Affiliate Links. Feel free to use them to purchase your tools if you like. If you do, I will receive a small commission. It will not change the cost of your purchase.
 As a long-time Woodworker, I've built a variety of large and small projects. I've learned to use the tools available to me to get the job done.
I'm currently building out my shop and starting to create again. I need to work with wood or I'll go crazy.
Follow along on my journey to rebuild my woodworking shop and start a business from the ground up.