
Sometime last fall (Fall of 2017) there was a windstorm that took down a huge yellow pine tree in our woods.
My Girlfriend’s brother decided that the trail needed to be cleared and proceeded to hack the first 16 feet of the tree into small rounds, presumably for firewood. Some of this I split and stacked into firewood to season. I moved only what was in my way so that I could attack the remaining straight section. This was about 25 feet to the first crotch of the tree. At the base, the tree was 23 inches in diameter. The top of this section slimmed down to around 18 inches. Beyond this, 12-inch branches spread out into the canopy of the tree.
I decided to attempt 2 sections measuring 13 feet and 11 feet. I needed to remove a section between the two so that I could get my chainsaw jig out of the first section before I started on the second. I estimated at 18 inches would be sufficient for me to walk around the log and get the Alaskan Chainsaw jig out of the end of the tree as I cut.
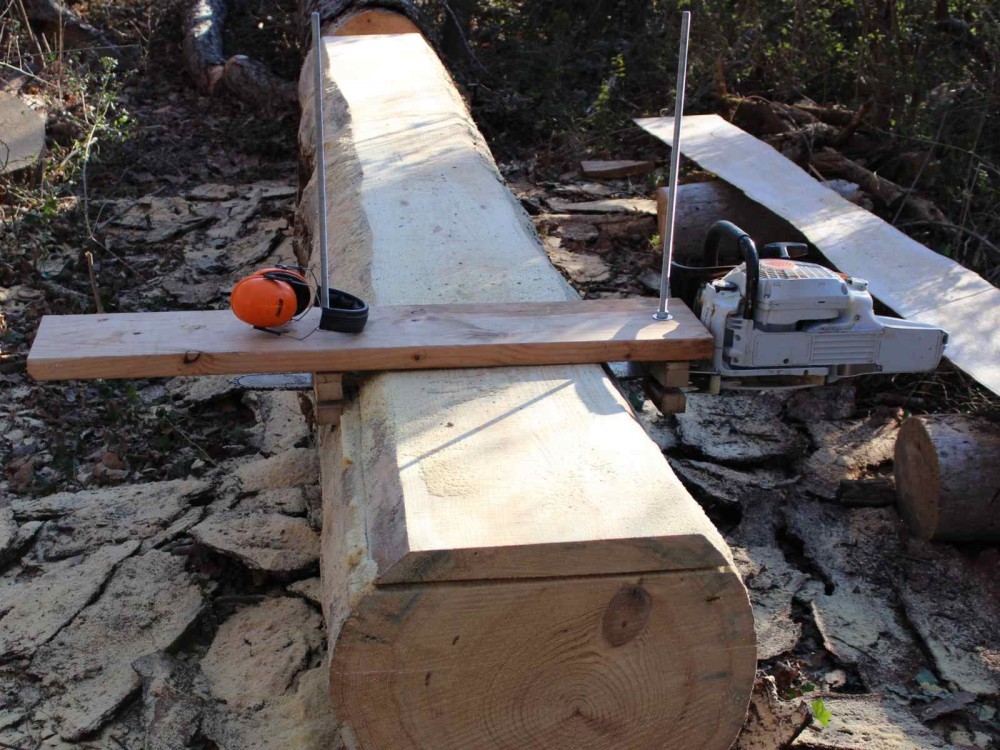
I set up the jig to cut the minimum depth. This is slightly over 2 inches. Until I redesign the clamping part of the jig, I’m stuck with this. I don’t have a problem with 2 inch thick boards from a 23-inch tree. There should be some nice planks for table tops and supports with this dimension. The drying process will also produce flatter and more stable stock at this dimension.
I cut the first two slabs from the top of the 13-foot section at the 2-inch dimension and when I reached the third board, I added a few spacers to the Alaskan Sawmill to give me a full 5-inch thick board. I was just above the center of the tree at this point as I had cut a leveling cut from the top at about 2 inches and 2 more at 2 inches then with the 5-inch board I was at about 11 inches in plus the 1/4 inch from each pass of the chain or 11 3/4 inches.
It took everything I possessed to move the 5-inch thick 22-inch wide and 13 feet long board onto the offcut stack. I will definitely need to have some mechanical advantage in the wings when I try to move this to the stickered drying stack. I will be moving the boards from the offcut stack about 200 feet to a level and stable location for it to dry.
I continued to cut the remainder of the log into 2 inch thick boards. I have 3 2 inch thick boards that are almost a full 22-inch width and 2 more that taper down from 20-18 inches. The top and bottom boards are also about 2 inches thick but are curved on one side. I’m thinking they would make some nice rustic benches. Perhaps a waterfall style bench or live edge entry table would also work. I’ll have to decide where to best use these.
Overall I have 5 boards 13 feet long and 2 inches thick and one 5-inch thick board 22 inches wide of the same length.
Calculating board feet
To calculate board feet, measure the length of your board, and convert to inches ( 13 feet = 156 inches). Measure the width of the board at its thinnest dimension (22 inches) and multiply these times the number of inches thick (2 Inches) This will provide you with a cubic dimension Length x Width x Depth. Divide this by 144 (12 Squared). This will give you the number of square feet of a board 1 inch thick.
Calculating my largest board in board feet I have a 5-inch thick piece 13 feet long and 22 inches wide. 5 x (13 x 12) x 2=17160 square inches. 17160/144= 119.17 board feet in just that one plank.
The widest 2-inch piece yields 47 2/3 board feet. The smallest 2-inch piece yields about 39 board feet. Overall if I estimate the 2-inch boards at 40 board feet and add the 5-inch piece I have a little over 300 board feet from this first section of pine log.

Currently the lumber yard charges between $2.45 and $3.75 for clear yellow pine. This pine is not clear but it is also wide widths which are difficult to find. A reasonable price for this lumber is probably close to $3.00/board foot. So, I can expect, once this wood has sufficiently dried, to get around $900 worth of lumber from this section of the tree.
Now that the weather is warming up here in Tennessee,( we had a spell of single digit temperatures) I got out to work on the second half of this log. An 11 foot section was left but it was attached to the remainder of the tree. I spent a full day trimming around this log and getting it supported so that it wouldn’t roll on me while I worked. In the process, I found that the remaining section of the first log was spiked into the ground with a 2 foot branch sticking into the earth. It was impossible with the weight from the remaining slab and the depth of the submerged branch to move. I ended up cutting 3 feet off and levering the remainder out of the ground with my Peavy. I tried to imagine what might be hiding inside the pieces of wood as I trimmed around this trunk. My chainsaw carving chops will be getting some time served on pine offcuts.
With the second part free of the tree, I gathered my guide, adjusted it to the length of the current Piece and fastened it to the ends of the log. I adjusted the depth of cut on my jig to clear the angle iron holding the guide and made my first cut. I opted for a depth of cut of 5 inches which put the chainsaw blade about 3/4 of an inch below the angle iron supports.
While I was away from the log, I sharpened the ripping chain so the first cut of this section was like cutting butter. Setting up took longer than the actual cut. I was quite pleased with how easy a sharp chain cuts and am getting a feel for how long a chain can be used before it requires touching up the cutting edges.

I readjusted the depth of cut for a 2-inch cut and completed 4 boards before I ran out of daylight. The final cut was difficult so I knew that I was in need of another sharpening. A quick touch up of the chain took about 30 minutes. I was ready to complete the log first thing in the morning. By 10 AM I was done.
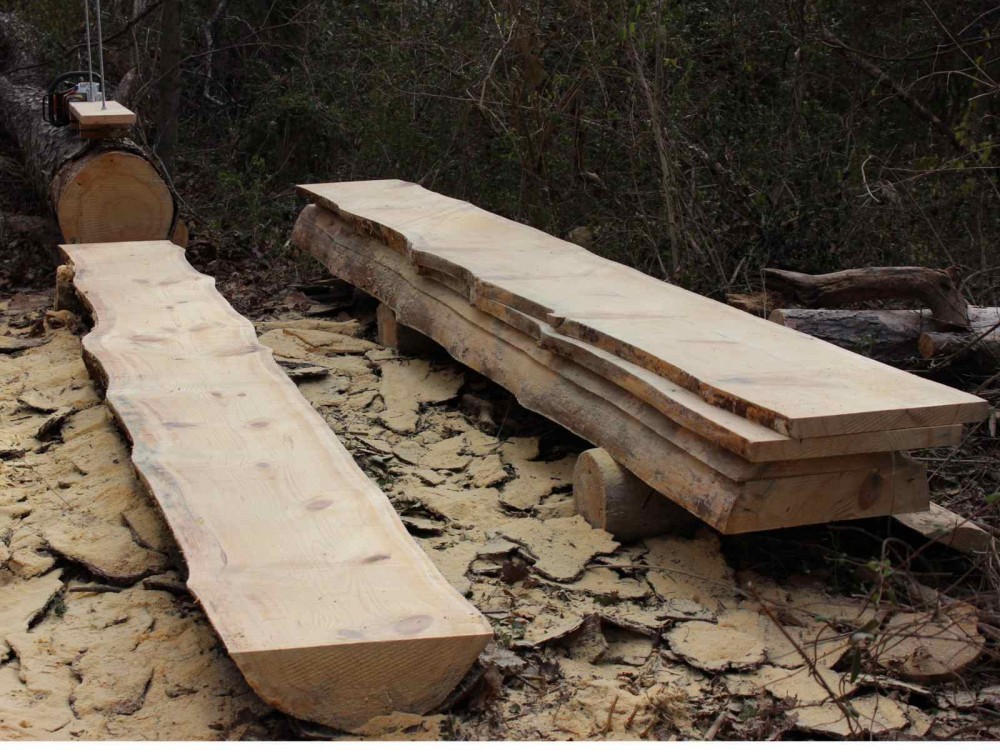
Now comes the tedious part. It is time to move all of the cut wood to a level location where it will be stacked and stickered to air dry.
The boards are all moved. I thought you might appreciate the view of the stack of wood.
