Moving the Black Cherry Tree
I cut the tree from it’s rootball and connected my new winch to the tree. I acquired a 5000 lb ATV winch on Black Friday and mounted it to a trailer hitch mounting bracket. The cables were long enough, with the addition of jumper cables, to reach the battery on my truck. I dragged the log out of the brush and then pulled it down the trail to a level place where I could work on the tree. I used a wedge that I cut from the end of the log to get the tree up on roller logs. This made moving the trunk much easier on the winch and sped the move up immensely.

It was so much easier to use the powered winch vs. the come-along that I used to move the Oak log in South Carolina. I’m wondering if I should get the truck to SC somehow for the trip that I move the remaining logs. The vehicle we typically use doesn’t have a tow-hitch so there is no way to connect the winch mount to that vehicle.
Creating a Reference Surface
On the Live Oak log that I’m working on in South Carolina I attached a ladder to the tree to provide a reference surface for the first cut. For this log, I found 2 straight and unwarped 2 x 4 boards and attached them to two pieces of angle iron. The angle irons were first attached to the ends of the log and leveled to each other. Then the 2 x 4 s were attached to the angle iron. This process works better as I have the screws going into the tree horizontally and the vertical screws go up into the guide boards. There are no screws driven into the top of the log and no screws extending into the tree to avoid.

The only drawback to this arrangement is that I had 14 foot 2x4s and they flexed a bit as I was cutting the center of the tree where they were unsupported. A short piece screwed into the 2x4s to connect the center of the boards and provide a bit of support would have been a good idea.

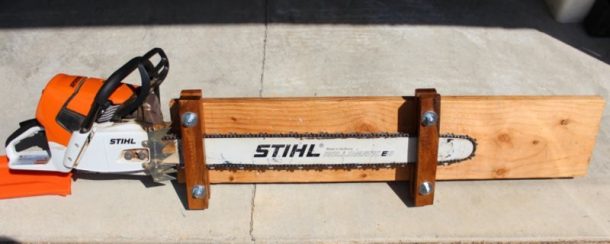
Fine Tuning the Alaskan Sawmill
Having learned a few things with the Live Oak log in South Carolina, I reworked the clamping system. I added fender washers to the clamps so that the nuts had more bearing surface on the softwood of the pine. The idea is to give the clamps more surface so that the wood fibers aren’t crushed and the clamps hold better. I also purchased slightly longer bolts and added an additional jam nut on the ends so that the nuts wouldn’t vibrate loose.
I had the crosscut chain sharpened and purchased a rip chain to see if it made a difference in the cut and to have a spare chain in the event that the crosscut chain still wasn’t up to the task ahead.
The First Cut
I had a bit of a false start on this one. I had the 2x4s all levelled and ready to go and started my cut. 18 inches in from the end of the tree, there was a partial cut through the trunk. As I neared this cut I realized that when I hit that point the end of the reference 2x4s would no longer be attached to the tree. This just wouldn’t work very well. I needed to refasten the reference board to the tree to get a good surface to cut. I finished cutting off the first section then refastened the reference boards to the main section of the log. When I finished the first cut, I completed cutting off the short section of the log. My Cherry log was now just over 13 feet long.

With the crosscut chain installed I completed the first cut. By the end of the cut, I was working hard pushing the chain. The sawdust coming from the cut was fine and indicated that I was cutting with a dull chain. I was able to complete the cut but decided that it was time to try the ripping chain.
Completing the Cuts
I took a bit of time out of my milling, dismantled the Alaskan Sawmill and installed the rip chain onto the 32-inch bar.
A rip chain changes the cutting angle on the cutting points to a shallower angle.
A Crosscut chain has the chisel teeth filed to 35 degrees a rip chain has the chisel teeth filed to between 10 and 15 degrees. A shallower angle will provide a smoother cut. It is also designed to cut the long fibers of the parallel cut that happens when milling lumber with the grain of the tree. Either chain will work but for the best quality cut a rip chain is superior.
When I dismantled the jig, I loosened the clamps from the 3/8 inch bolts and opened them up sufficiently to slide the jig off the blade of the saw. This saved time as I didn’t need to remove the nuts on the long threaded rod (takes forever to unscrew these nuts). I changed the chain over, checked the tension, briefly started the saw to make sure that everything was running correctly and shut down the saw. I rechecked the tension and found it to be fine, checked the blade clamping bolts and then reassembled the Alaskan Sawmill onto the blade. Finally, I filled the gas and the chain oil reservoir.
I have found that this saw is a bit difficult to start if you let the gas tank run dry while making a cut. It is much easier to check and refill the gas before you start a cut than to pull the saw out of the cut, fill the tank (and the oil) then restart the saw after you get enough fuel moving through the system for it to catch. On the Stihl 661 it takes a bit of effort to start this saw and I’d prefer to do this as few times as necessary.
With everything Organized, I started the second cut. The jig performed fabulously. The sawdust coming off the blade was coarse and plentiful as expected. Feed rate was excellent and the pressure required to move the saw through the wood was minimal compared to the last cut.

Ya gotta love it when a plan comes together.
The Final Outcome
The second, third and subsequent cuts went well. I was able to cut 60 board feet of 8/4 lumber. There are 5 live edge Black Cherry boards with a hint of sapwood. This should make some absolutely beautiful products.

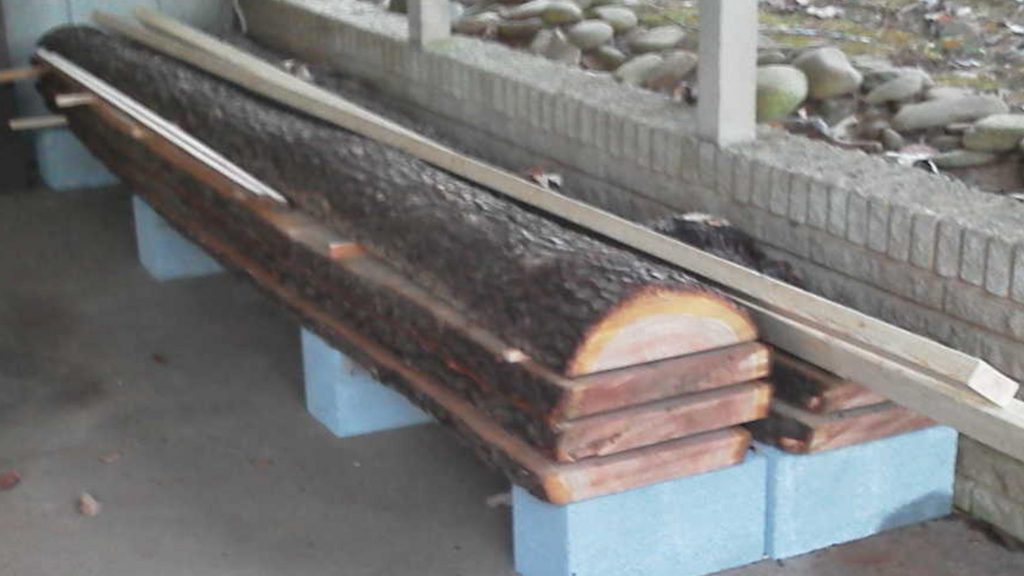
In addition to the dimensional lumber there are two half round pieces from the top and bottom. The top piece is uniform across the whole length the bottom piece is relatively uniform for 5 feet then tapers to almost nothing. Hmmm, how to use these pieces?
Now I needed to move these milled boards to their resting place where they will air dry until I have a better environment built to dry them. I lifted each board onto a lawn cart, balanced them over the axle and rolled them to the carport. They were stacked and stickered on leveled cement blocks. This gets them off the concrete where condensation will occur, makes sure they are supported on a level surface and gives them a protected area out of the sun and rain. While not ideal, this is the best that I can do at this time.