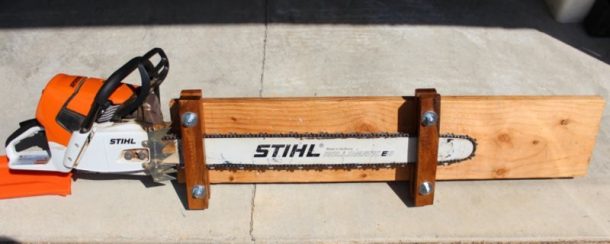
As I promised in the post I did on Chainsaw Chain Sharpening, I have ordered and received the Granberg Bar-Mount Chain Saw Sharpener, Model# G-106B. Here is a review of the Model G-106B and a walkthrough of using it to sharpen a chain. This Granberg File N Joint review is my opinion from my experience with the jig.

This jig is used to sharpen a variety of Chainsaw Chains and has adjustments so that it can be used with 3/8″ chain or any other chain as needed. You just need to insert a new file into the holder if you switch to a different gauge of chain. Two thumbscrews that hold the file make it easy to swap out or rotate your files.
As the description indicates this jig is designed to be mounted on the bar of your chainsaw. The chain is sharpened on the saw. You will need to support the saw somehow. In my case, I dropped the tailgate on my truck and used a quick-clamp to hold it in place and to keep the chain off the tailgate. This worked quite well although it was a bit low for a comfortable sharpening session.
Many sharpeners will use a stump vise if they are out in the woods and in need of a quick touch-up to your chain. Other’s will have multiple chains and put on a backup chain when the first chain is in need of sharpening. Then the Chainsaw can be mounted in a bench vise and sharpened in your shop where it is more comfortable.
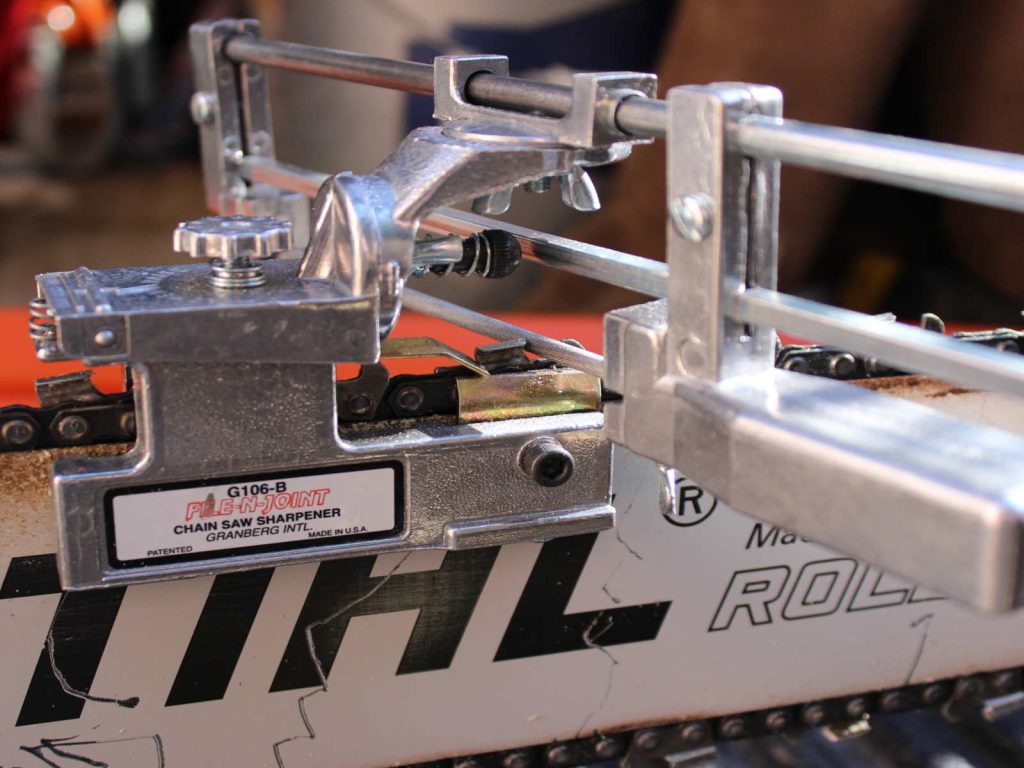
The Granberg G-106B attaches to the bar on the Chainsaw with a Thumbscrew at the back of the jig. There are two clamps at the front that also clamp onto the chain just above the rivets. To fasten the jig onto the bar, first you line up the front clamps with the rivets on the chain and tighten by hand the two allen screws. This sets the height of the jig. Moving to the back, you line up the base of the jig parallel to the top of the bar and then tighten the back thumbscrew. Then you loosen the front screws enough to allow the chain to move through the front clamps as it is advanced.

This view shows the chain clamps adjusted to hold the chain in place as you sharpen. *Note: the file is aligned incorrectly in this image. The file is set for the opposite tooth angle.
Before I begin to set-up the jig, I will find the shortest tooth. I use a caliper and measure each tooth until I find the shortest tooth. I mark this tooth with a red permanent marker. The ink comes off with a bit of rubbing but once dry will stay in place throughout the sharpening process.
I line up the marked tooth with the Granberg Jig and use this as the Master Link to begin my sharpening. All of the teeth will be filed to this length. If the variation is large, or the shortest link is much shorter than the rest, I’ll choose a different short tooth and leave the shortest one unsharpened for this round.
Adjustments
There are 4 adjustments that need to be made to get the jig in the right orientation to begin sharpening.
1. Adjust the sharpening angle

This image shows the filing angle gauge. The file is set to 15 degrees for a rip chain.
There is a wingnut under the top of the jig that is loosened to line up an arrow on the top of the jig to the sharpening angle. There are detents so that the adjustment lands every 5 degrees. You can swing the angle through 70 degrees, 35 degrees on each side of the zero mark. Tighten the wingnut when the correct angle is reached.
2. Adjust the tilt

This image shows the tilt angle gauge. For the ripping chain that I am sharpening, the angle is set to 0 degrees.
Another wingnut on the front of the jig allows the angle to be adjusted. In the case of Stihl chains, the angle will be 10 degrees right or left. Again there are detents set every 5 degrees to ensure that you are setting the angle to the nearest 5 degrees. The wingnut on the front is very hard to reach and the wingnuts are made from stamped metal. I expect that I will be swapping these out for a bit more robust wingnut.
3. Adjust the height

This image shows the file height adjustment knob.
When the angles are correct, set the file into the nearest gullet on the chain. Rotate the dial on the back of the jig to raise or lower the file until about 20% of the file is above the plane of the tooth. This will allow for the correct angle to be cut on the front of the tooth.
4. Adjust the depth of cut.

This image shows the depth of cut adjustment (the black knob) as well as the registration pawl in place behind the tooth.
There is a small metal pawl that registers the back of the Chain tooth. You will advance the chain until the pawl drops behind the tooth and then back up the chain until it stops. This provides a repeatable surface to reference the cut.
Running inside of the tilt angle wingnut there is a round headed bolt. The crossbeam of the jig will bump up against this bolt. The depth of cut is set by adjusting this bolt until it pushes the file away from the chain tooth edge. Then backing the bolt away (in) the desired distance. I have found 1/4 turn to be about right.
The jig is now ready to sharpen the first tooth.
Sharpening Process
Since the depth of cut is set, I file until the file stops biting the tooth. This indicates that I have reached the depth of cut. Some manufacturers recommend filing each tooth the same number of times but if there is tooth length variation filing to the depth stop will create a uniform tooth length.
To begin, I set the chain brake on the Chainsaw. I file the marked master tooth. Then release the chain brake and advance the chain until the reference pawl drops behind the next tooth with the same orientation. On a full complement chain, this will be the second cutting tooth.
I back up the chain until it is tight against the reference pawl and reset the chain brake. Then I file the next tooth.
Repeat this process until the marked tooth is again under the jig. You have now sharpened 1/2 of the chain.
Adjust the angle to the other side of the chain and reset the tilt angle if not zero. Unlock the chain brake and advance the chain one tooth. Look closely at the depth setting and the height of the file to verify that your cut will be the same as the previous setting and you are off and running with the other side.
Repeat the filing and advancing until you have completed the chain.
What I like about the Granberg File N Joint
Pros
- Set-up of the jig is pretty fast.
- The jig is able to adjust to different angles and pitches of Chainsaw Chain.
- Once set the filing is quite efficient and simple.
- The depth setting makes your chain uniform and reduces vibration during use of the saw.
- Fast and accurate.
- The detents make it easy to set repeatable angles.
What I don’t like about the Granberg File N Joint
Cons
- The jig itself feels cheap
- The wingnuts are pressed metal and don’t feel as though they will hold up over time they are also difficult to reach and operate.
- The handle is not long enough for a comfortable grip forcing you to use gloves for comfort.
- Adjusting for the Chain Depth gauges is difficult and didn’t yield good results for me. I had to use another depth gauge to set the depth of cut (rakers) on the chain. This requires another jig but is easy and repeatable without the Granberg File N Joint so wasn’t really a problem.
Overall Rating- Granberg File N Joint Model G106-B
For overall repeatability of filing angle and ease of use, I would give this jig a 5 Star Rating
For fit and finish, I can only go with a 3 star Rating.
Price is well worth the investment. For around $50 this is the best cost/benefit device that I could find.
I do recommend it for a quick manual sharpener that overcomes the most frequent problems of not getting a uniform edge on your Chainsaw Chains.
Granberg Model G106-B
 As a long-time Woodworker, I've built a variety of large and small projects. I've learned to use the tools available to me to get the job done.
I'm currently outfitting my new shop. I need to work with wood or I'll go crazy.
Follow along on my journey to rebuild my woodworking shop and start a business from the ground up.